When creating surface models, designers often find the need to adjust the edges of a surface or move the boundaries. Typically, this takes one of two forms:
- Extending a boundary edge, which is smaller than the desired result
- Trimming back a boundary edge, which is larger than needed
Both of these can be achieved using the Move Boundary feature in Onshape.
The Move Boundary feature requires one primary input: the boundary edges which you’d like to move. As a shortcut, if you would like to move ALL boundary edges of the surface, you may instead select the entire surface from the parts list. There are then four end conditions you may then select from:
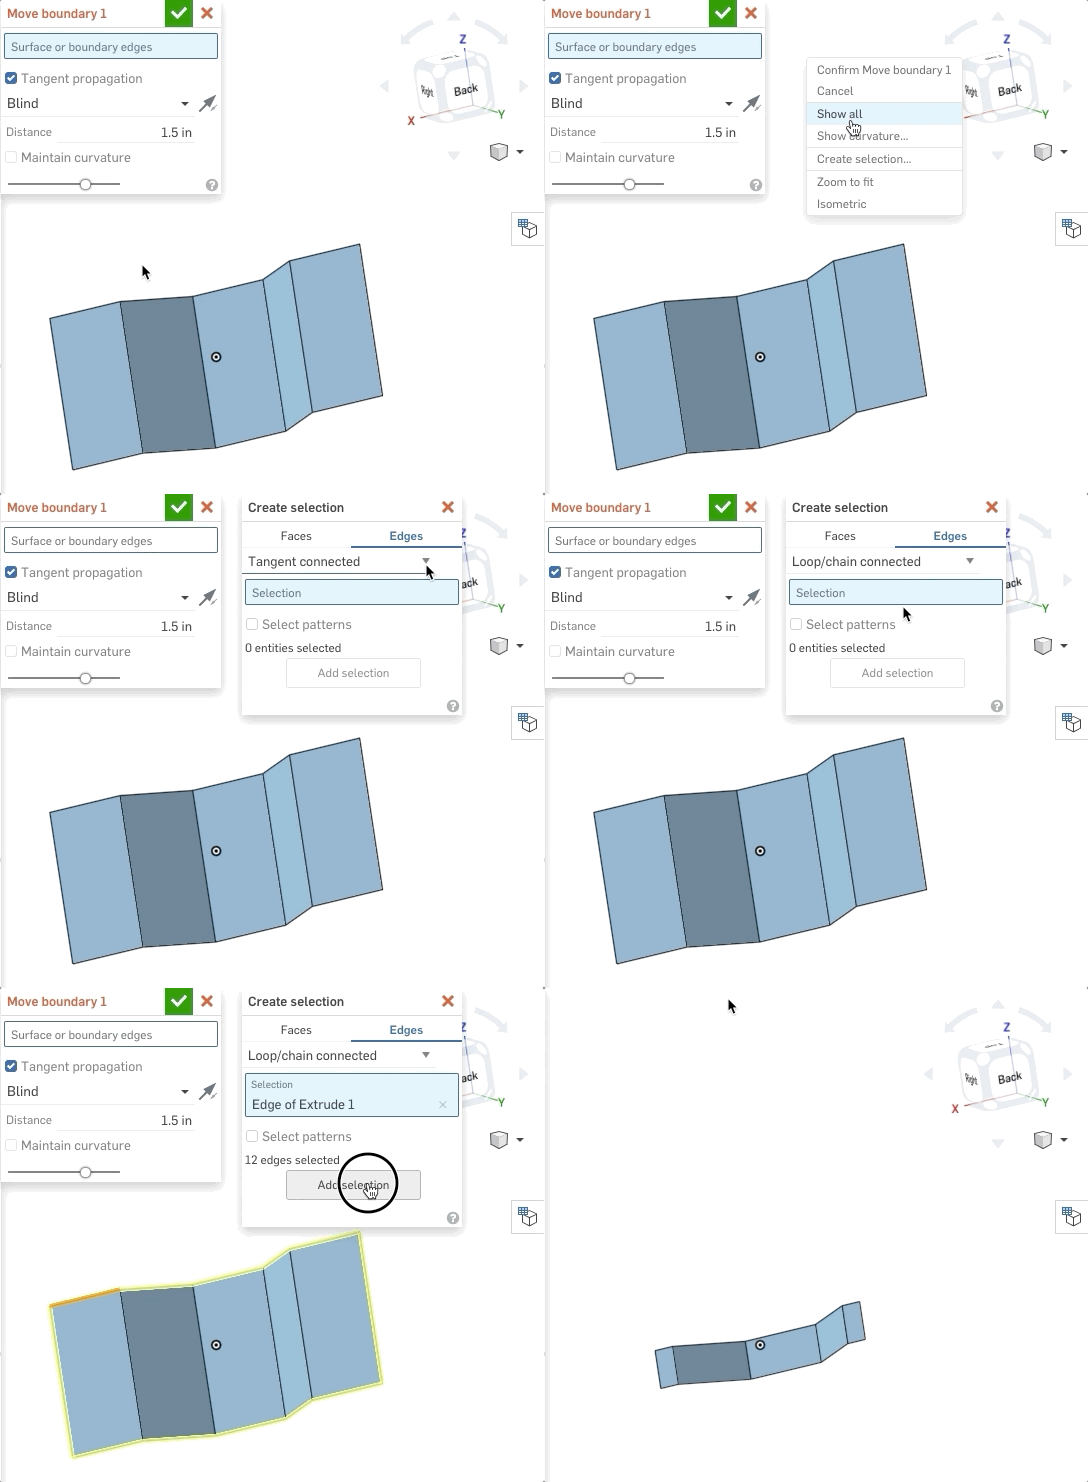
1. Blind – This moves the selected edges a specified distance. Use the “opposite direction” button if you are extending or cutting back the boundary.
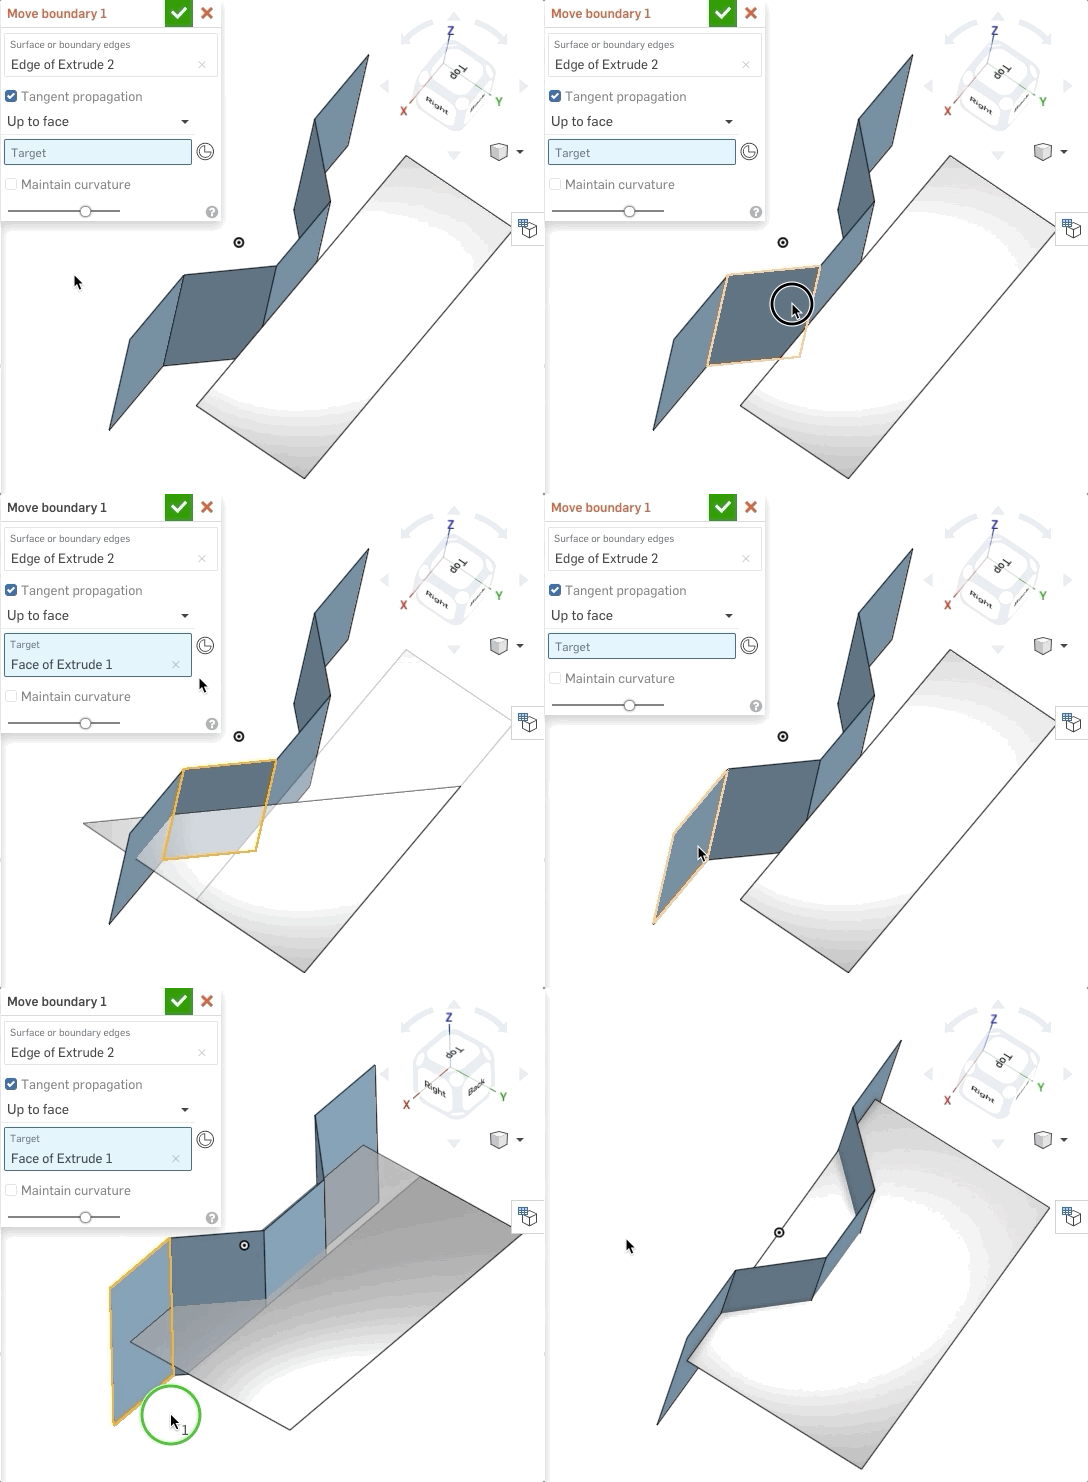
2. Up to Face – This moves the selected boundary/boundaries until they touch a selected face, or a projection/extension of that face.

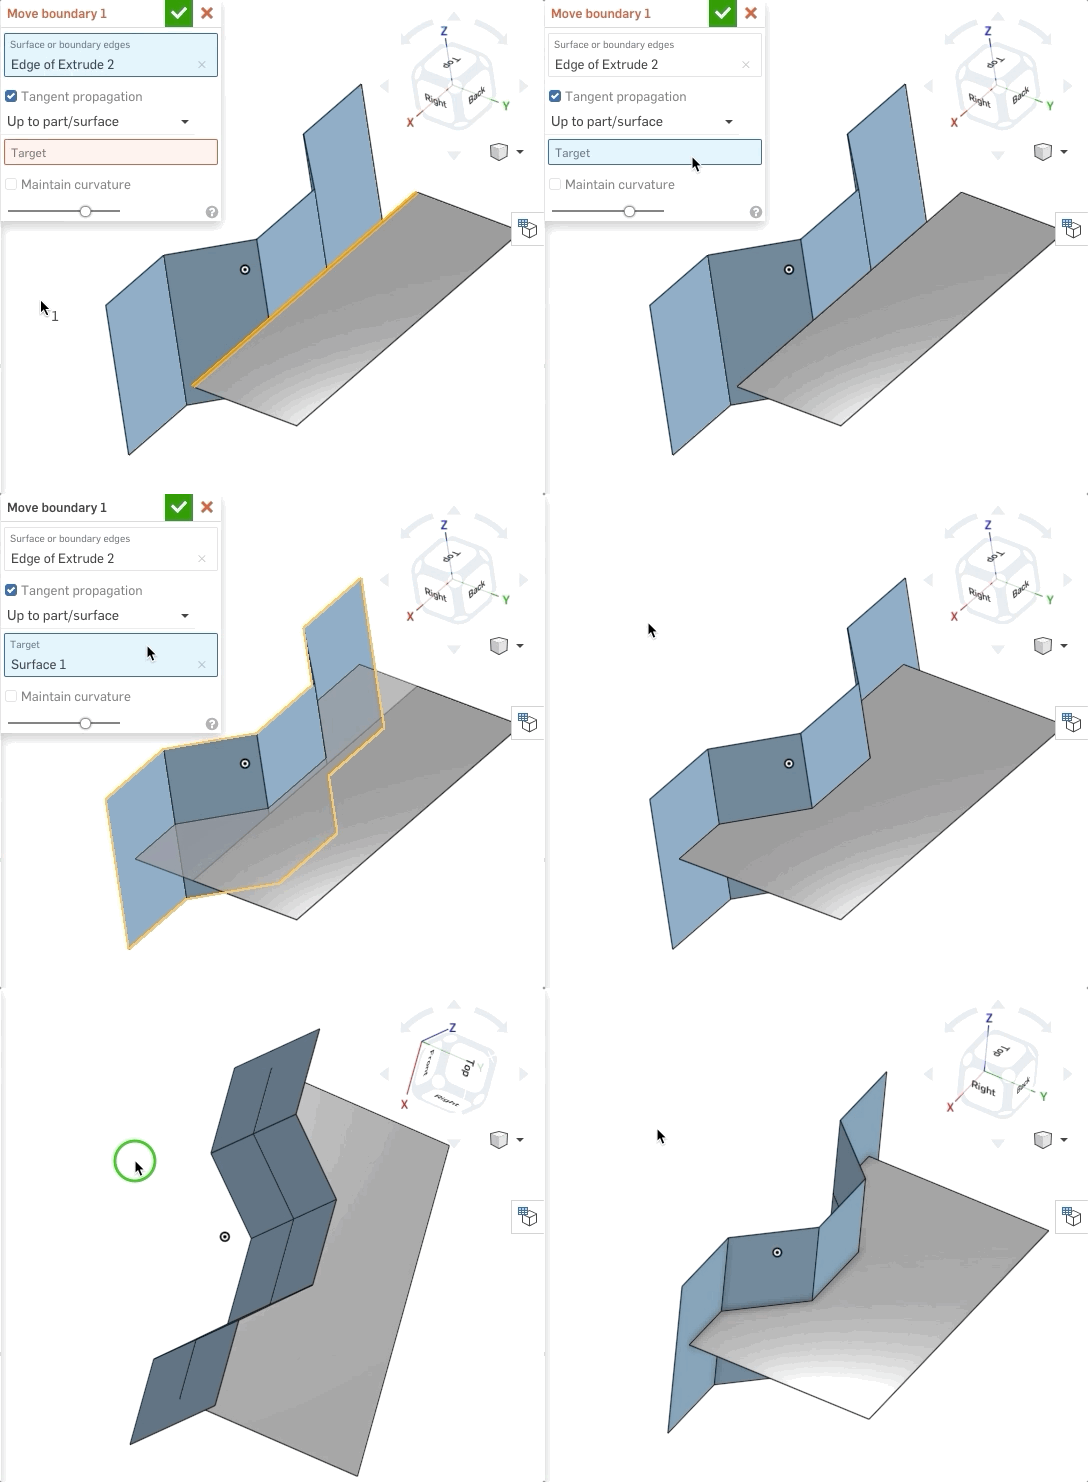
3. Up to Part/Surface – This moves the boundary edge of the selected surface until it touches another surface or solid part.

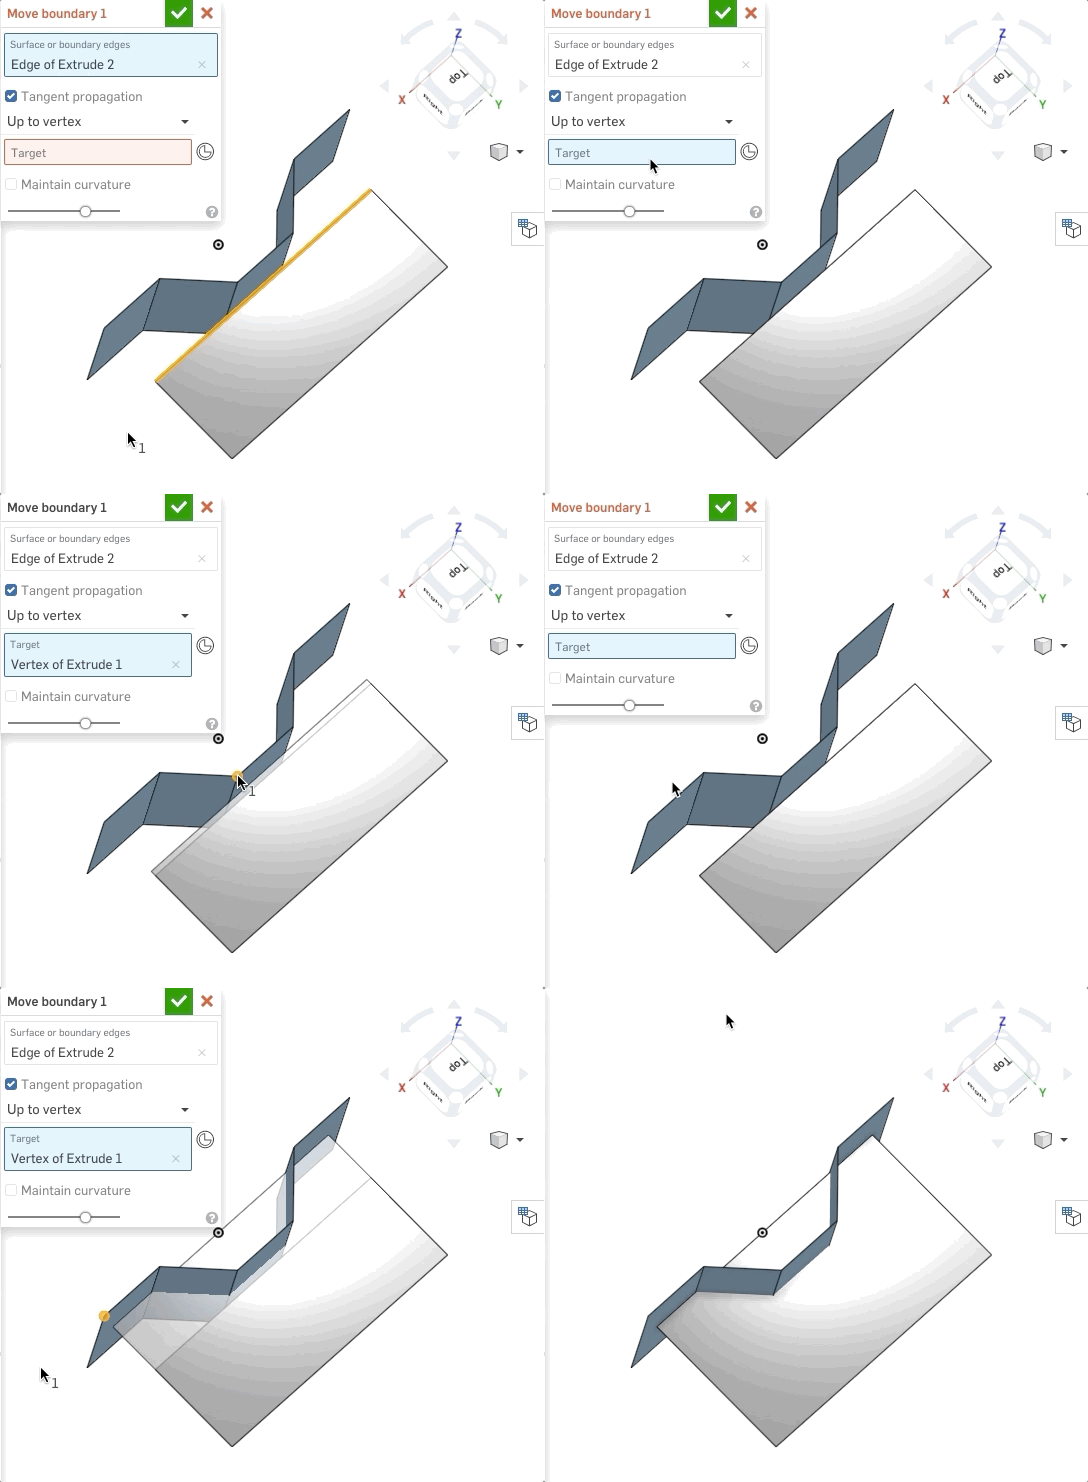
4. Up to Vertex – Similar to Up to Face, but instead accepts a single vertex reference.

In the simple examples I’ve shown above, there are very few edges or faces to select. However, in practice using this feature, you may find you are selecting many edges at a time. The boundary edge selection field does include a “Tangent Propagation” toggle to make this easier. However, you can also use the “Create Selection” feature, which is available from the right-click menu, to further assist:

Want to learn more about Onshape’s Selection Tools? They are detailed in the Direct Editing Self-Paced course in the Onshape Learning Center.
For more Onshape Tech Tips, review the most recent technical blogs here.


