The sketch is the backbone of any robust solid model. Using dimensions and geometric constraints like parallel, concentric and equal, you can add design intent to your sketches so that any future changes will not require any additional thought or rework in order to maintain that intent.
So given how critical sketches are, let's take a look at some of the more frequent mistakes made by CAD users and how to avoid them…
1. When to Use Dimensions Versus Constraints

Adding design intent using geometric constraints
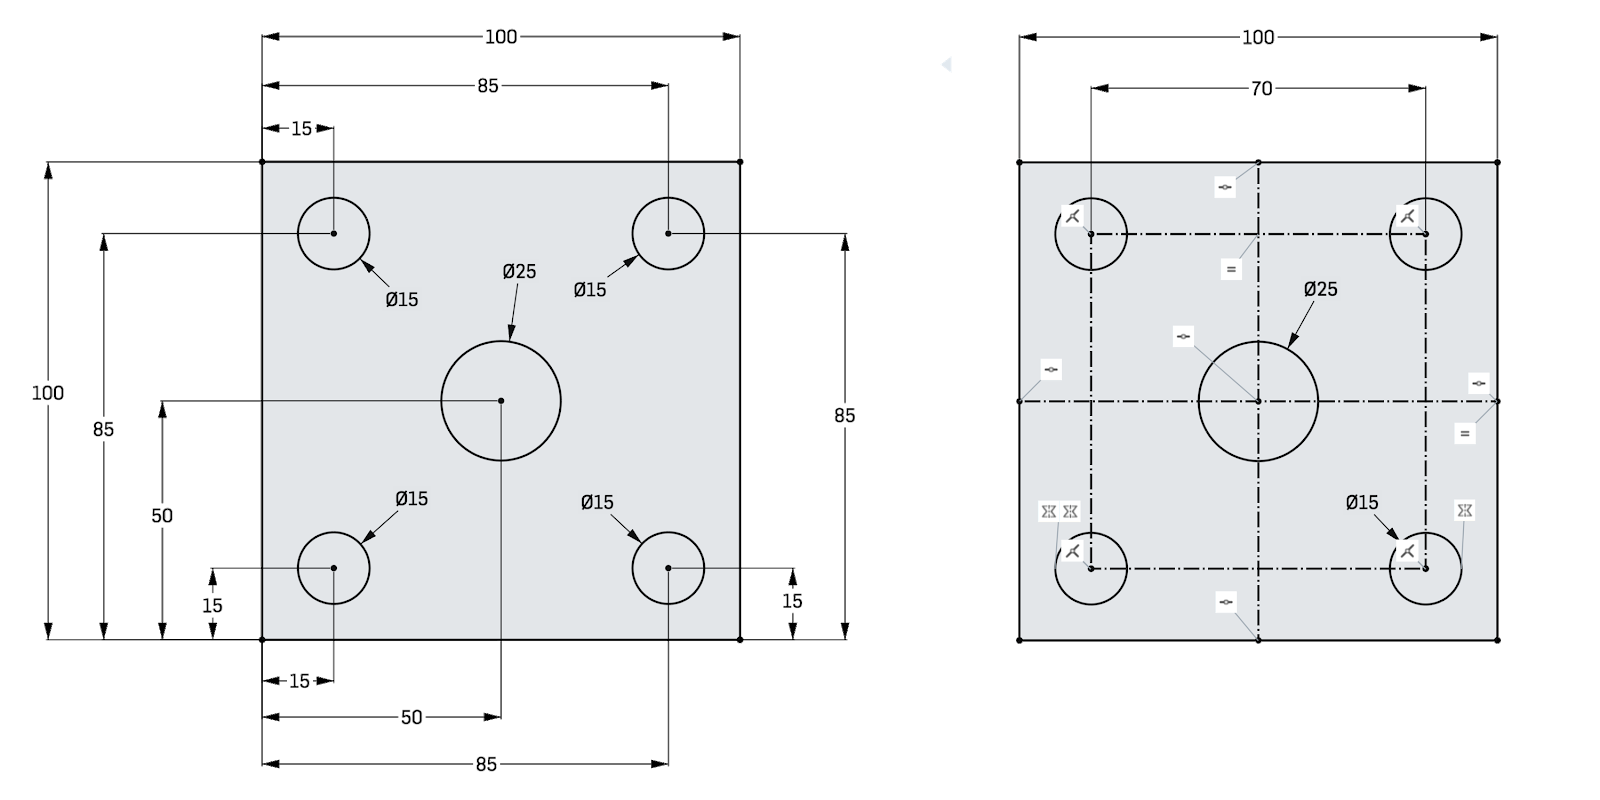
Consider these two identical parts. The one on the left is dimensioned from a single datum as it would be on a manufacturing drawing and every hole is called out individually. This is an extreme example, but can you imagine how much work would be required if you had to move the hole centers? That’s a lot of clicks and extra manual checking required even on the most simple sketches.
Now take a look at the sketch on the right. Using some extra construction lines and some mirror, equal, and midpoint constraints, you can visually describe your design intent: “a 100mm square plate, with a 25mm diameter hole at the center and 4 x 15mm holes spaced equally, 70mm apart.” Now try to describe the sketch on the left. Not so easy.
When creating fully defined sketches for production models (all geometry is black), always prioritize constraints over dimensions. That way you can be sure your sketch will update predictably and preserve your design intent. Manufacturing information can be added to the drawing later.
2. Avoiding Detail Overload
One of the biggest mistakes that can be made with a sketch is to make it too complicated. Keep it simple. It’s very tempting to add all the detail you need to one master sketch, but once you get over a certain number of sketch entities, you’ll soon meet the point of diminishing returns. Sketches will take longer to create, constraints will be harder to add and troubleshoot, and design intent will be more difficult to understand. Plus, for every entity, constraint and dimension added, the sketch solver has an order of magnitude more simultaneous equations to solve, which has an adverse effect on performance.

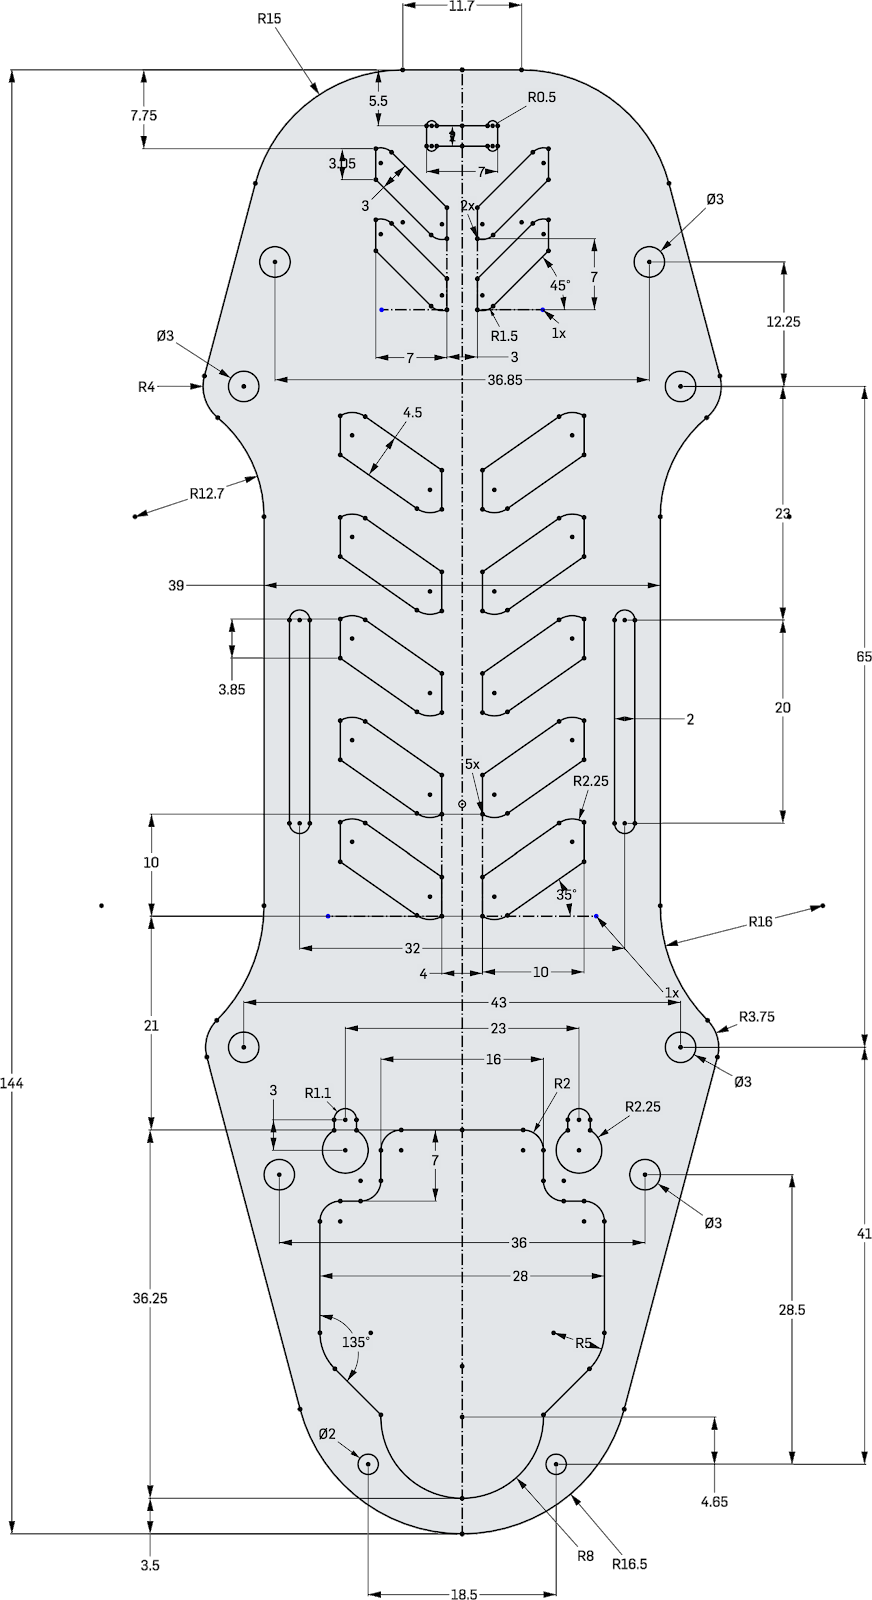
How NOT to create a parametric sketch
If you do need all that detail, break it down into two or more sketches. In the example shown above, the mounting holes are the important features and the external profile that surrounds them is secondary. There are also a number of vent features whose size and position are a tertiary consideration.
Therefore, Sketch 1 should contain just the mounting holes, Sketch 2 should contain the external detail, dimensioned relative to Sketch 1, and Sketch 3 should contain the vents, dimensioned relative to the external profile and/or the mounting holes.
Remember that sketches that drive solid features do not need to be in any particular order. Your first extrude can be driven by Sketch 2, and your cutouts driven by Sketches 1 and 3.
3. When to Use Sketch Fillets Versus Feature Fillets
On the theme of keeping sketches simple, should fillets be added to the sketch or as a feature in the solid model? Adding fillets to a sketch is just adding complexity. However, if your sketch is simple and the feature that is derived from it is simple, then there’s no harm in including fillets in your sketch. If you work to the rule that functional fillets should be added to the sketch and cosmetic, break-edge fillets should be added to the model, then you’ll be in good shape.

Adding fillets to the sketch or the model
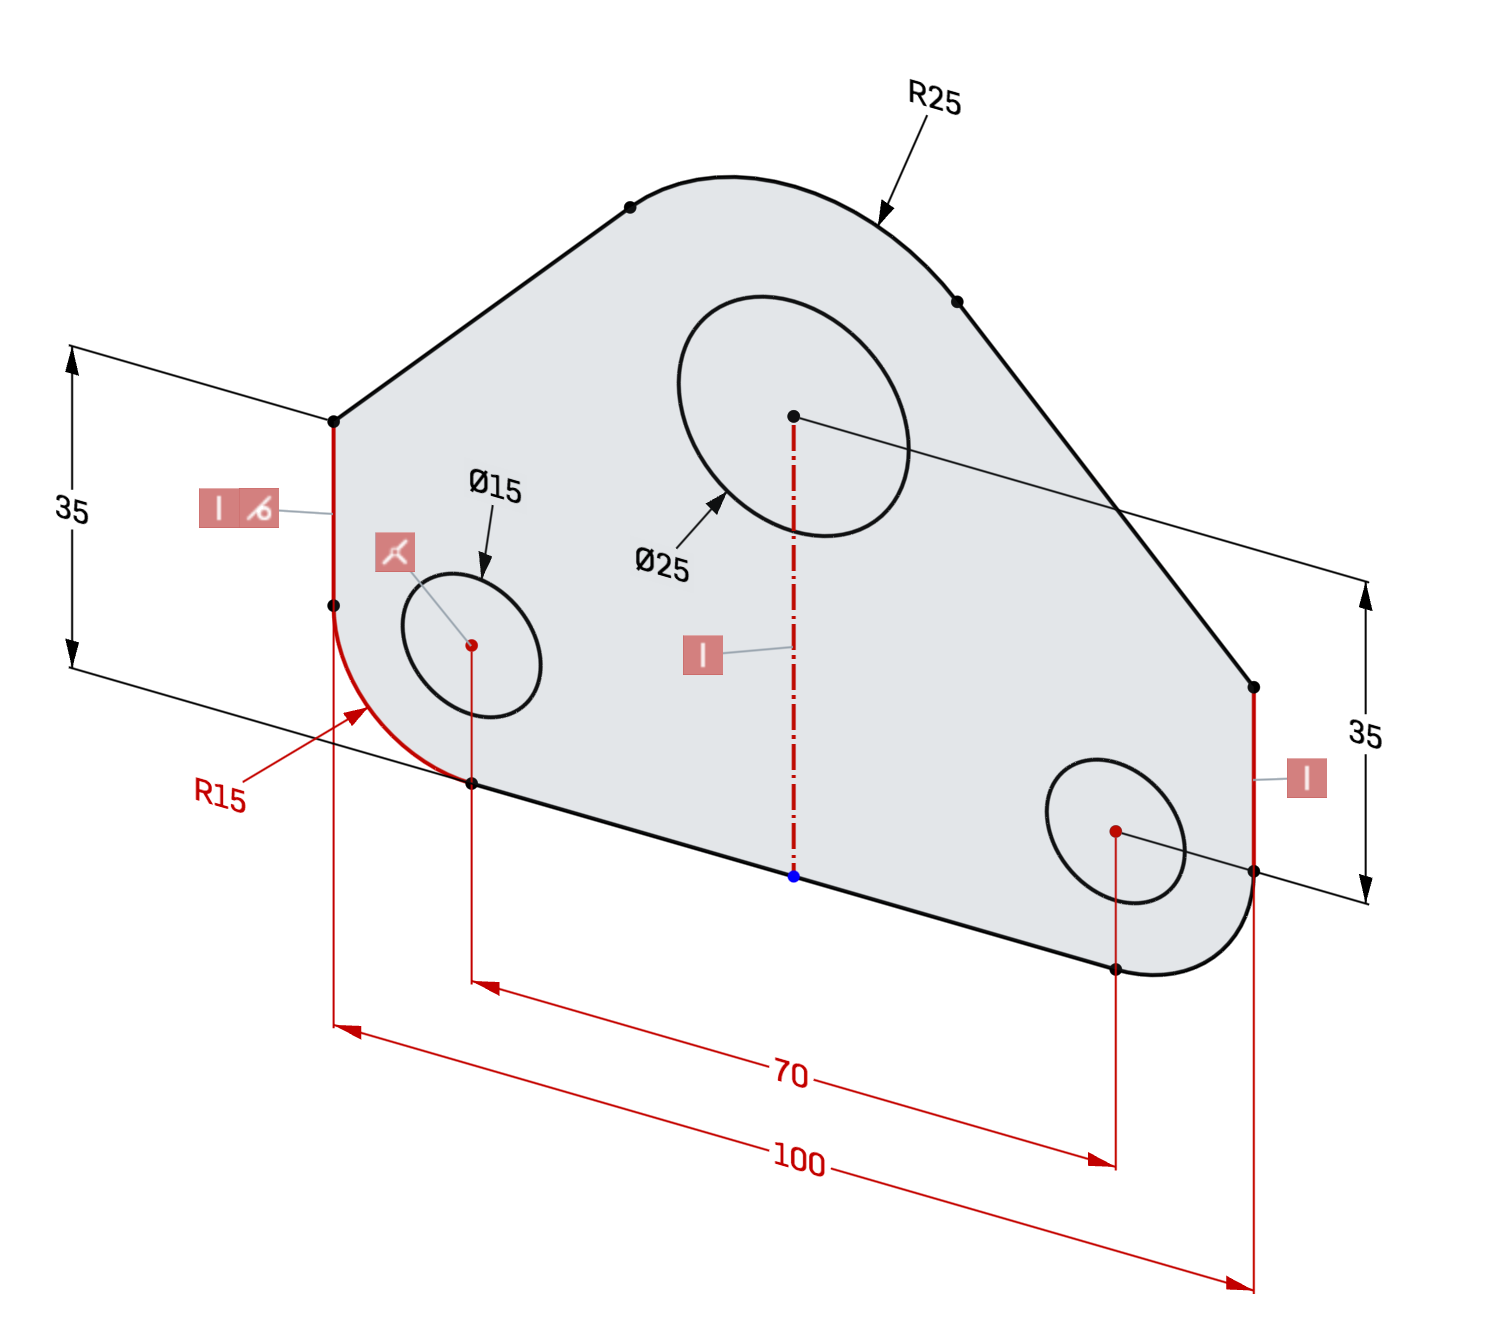
In the first sketch on the left, the arc at the top is concentric to the large hole. This is absolutely a functional fillet because it is concentric to another entity in the sketch. However, the sharp edges at the intersection between the vertical and angled faces are purely for cosmetic purposes. These should be added as a fillet feature in the model (highlighted orange). However, if fillets are to be added to the bottom corners, and they are to be concentric to the two smaller holes, then you can add them to the sketch if you wish.
IF THINGS GO WRONG, DON’T PANIC!
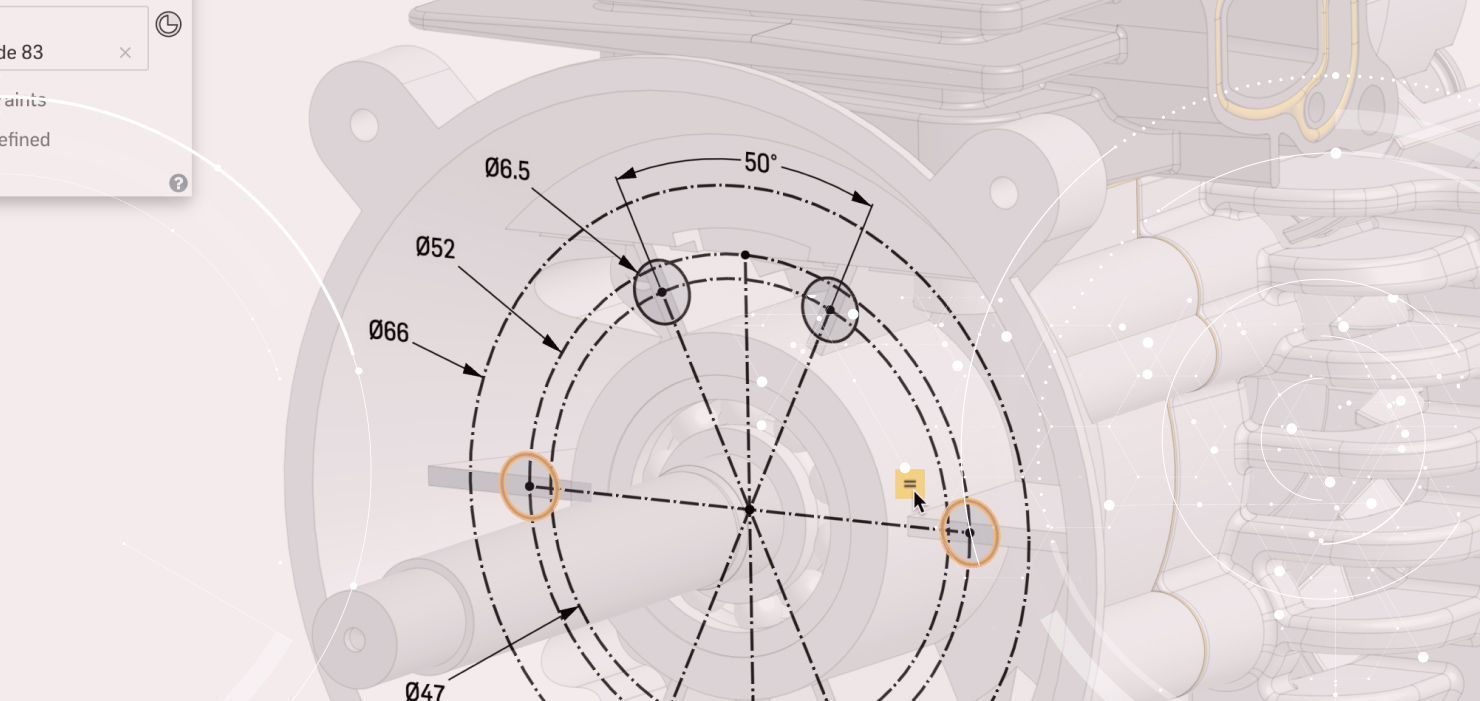
If your sketch turns an evil shade of red, something has gone awry. Don’t panic! It’s simply the sketch solver letting you know that you have conflicting constraints or dimensions. For example, if you set a circle to be equal in diameter to another and then add a dimension, which should the solver solve? The dimension or the equal constraint? This is where you have to help it out a little.

Which of these dimensions or constraints are not required?
When you have a conflicting constraint, you may expect only those two conflicts to be highlighted. When several appear at once, it can be a bit daunting. This is simply the sketch solver telling you that if you delete any one of the highlighted items, the sketch can be solved. So which one should you delete?
That can be a hard question to answer – especially if your sketch is complex (remember, keep it simple). Looking closely, you will see that the fillet in the bottom left corner has a dimension and it has a coincident constraint to the center of the hole. Delete one of those (probably the dimension, as per previous instruction) and you’re golden.
Once you’ve created your first sketch or layout sketch, you can start to build your 3D geometry.
Interested in more modeling tips? Check out our Masterclass on 3D modeling video today!

