3:12
Last week’s Tech Tip was about the Create Selection feature. This week’s tip takes a deeper dive into selection as a whole, discussing several techniques to refine your selection.
Selection is Additive
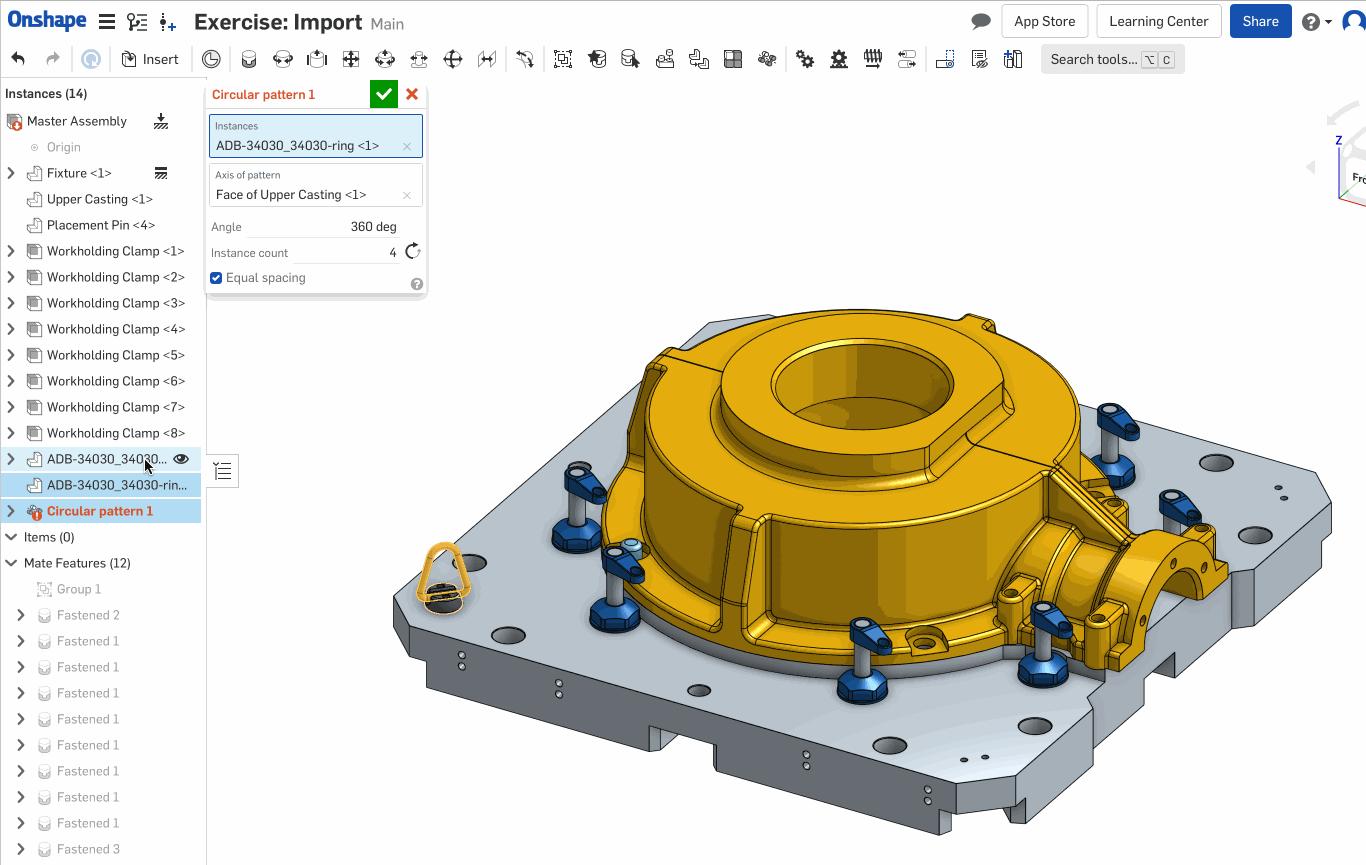
To add to a selection, simply select them one after another. Using “Shift” or “Ctrl” to add items or entities is not required. If something is accidentally selected, just click again and it becomes deselected. To deselect all items at once, click in model space or press the spacebar. These tips are used below to pattern bolts and lifting rings around the base of a fixture:
Use “Select Other” to Select Through
Next, you need to add a fillet to the upper edge of the fixture (grey), but not the bottom edge of the casting (yellow). The two edges are butted up against each other, so it could be difficult to make sure you have the right selection. This is where Select Other can be useful. It allows you to cycle through the different entities that are currently coming into contact with the mouse pointer (including ones hidden behind the visible geometry).
In the Part Studio, bring up the Fillet command, but instead of just clicking the edge, right-click on the edge and choose Select Other (or use the ` key above the Tab key). For more details on Select Other, take a look at this Tech Tip.
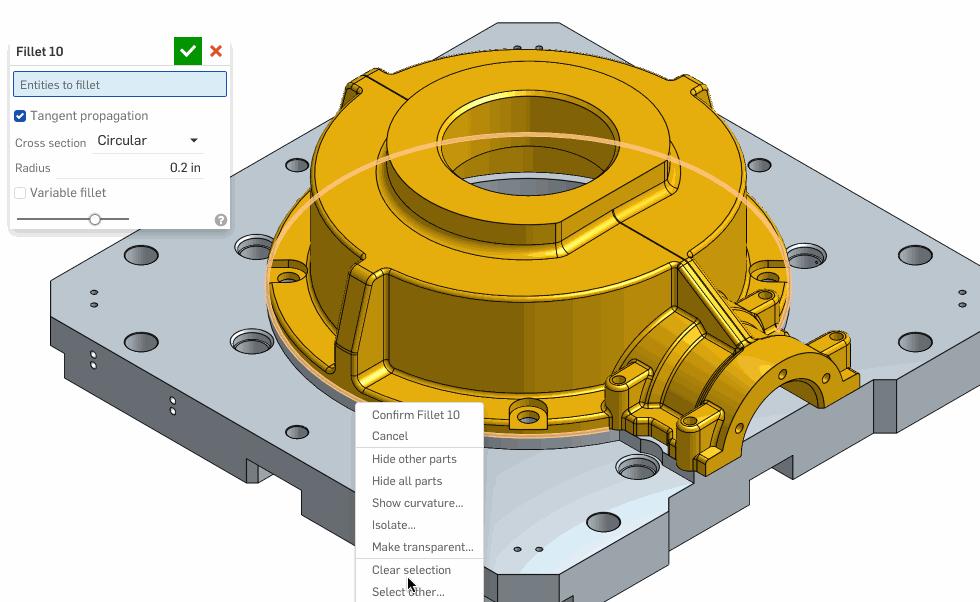
BONUS TIP: Select Other can also be used to easily select entities underneath a transparent object.
Feature Selection Combines Faces with Coplanar Sketches
Now, the bottom needs to be extended out from the fixture another inch. In the Part Studio, you can see a sketch with two rectangles showing on the surface.
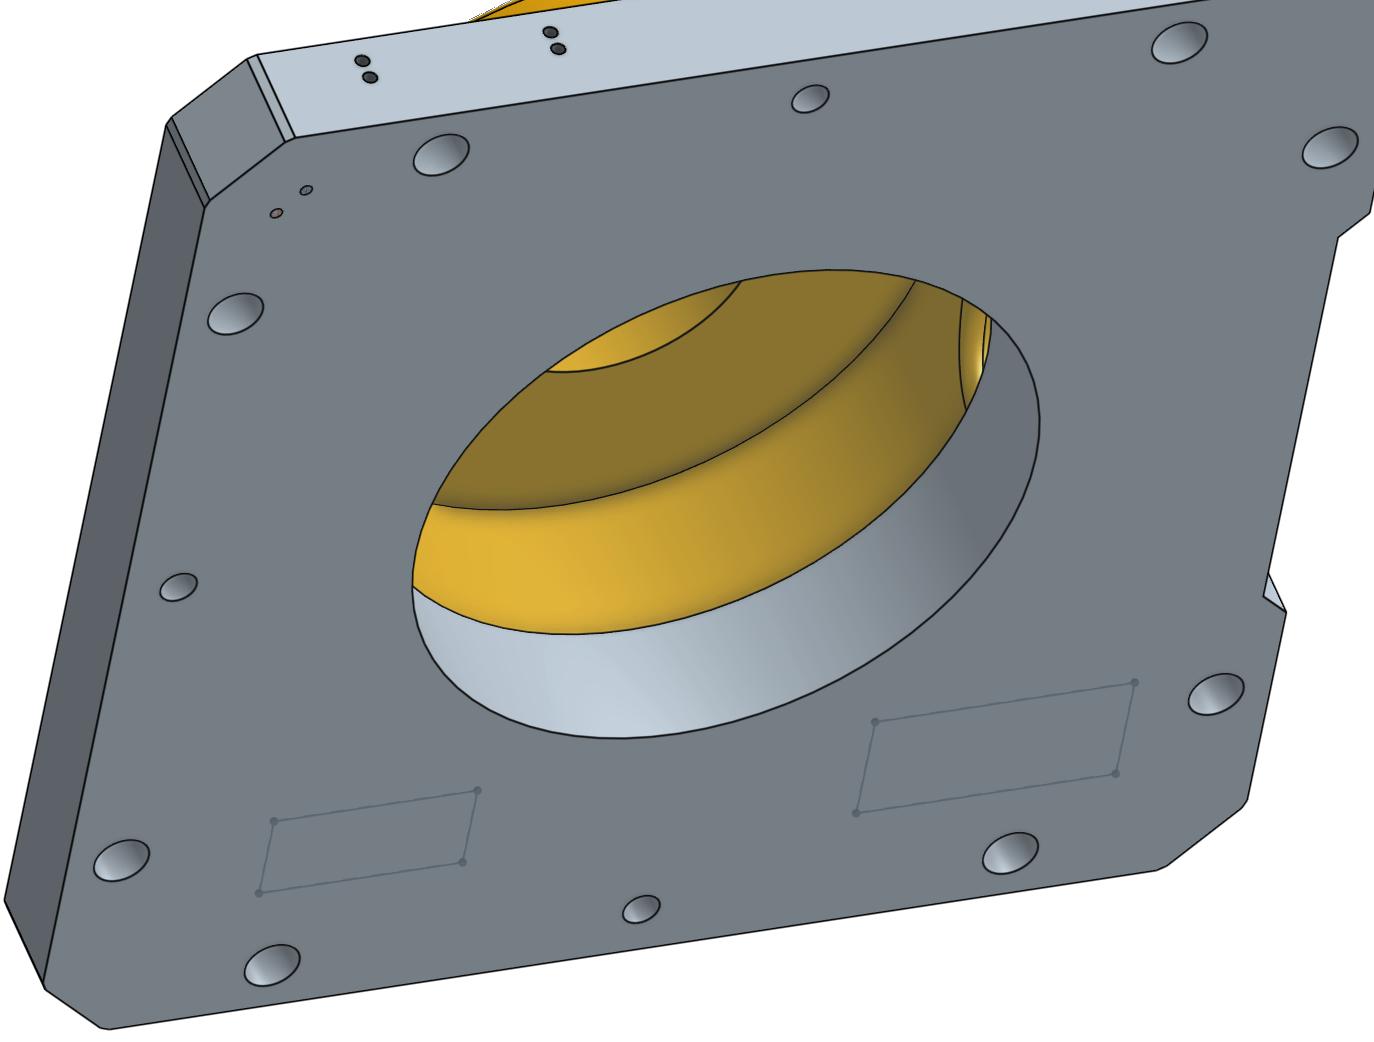
If you start an Extrude and select the bottom face of the fixture, it takes into account the visibility of the sketch when selecting regions. This can be useful if your intent was to extrude the face without the rectangles. If your intent was to extrude the entire face, you would need to make sure to select those regions as well so the entire face is extruded, or hide the sketch before initiating the feature.

It’s Important to Change Visibility to Get the Right Selection
Sketches are automatically hidden once they are used by a feature. A hidden sketch reappears when you edit a feature it is based on, but if you intentionally show/hide the sketch (this usually happens with sketches that are utilized for multiple features) it maintains its visibility (shown or hidden) when editing the features it depends on. If you are having trouble editing the sketch regions for a feature, be sure to check that the sketch is shown.
An example of this behavior is shown below. You need to remove one of the holes from the Extrude in the fixture. If you try to select or deselect a sketch region while the sketch is hidden, it instead tries to select the face. Once the sketch is shown, select the hole and it’s removed from the feature.
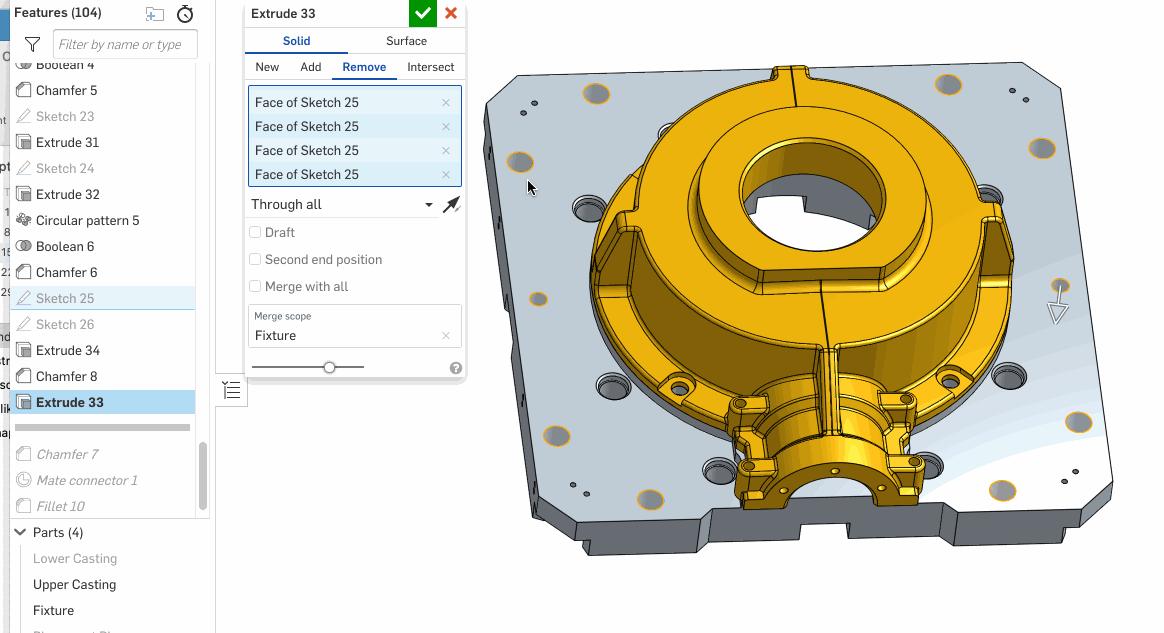
This tip can also be carried over to part visibility. Hide the parts you aren’t currently using, and selecting the right entity is much easier.
Create Selection
When you need to select many faces or edges at a time, the Create Selection tool can be really helpful. The fillets on the casting (yellow) need to be modified, but it is an imported part, so there is no feature to edit. Instead, Modify Fillet combined with Create Selection easily allows you to modify them. For more detailed information on Create Selection, refer to last week’s Tech Tip.
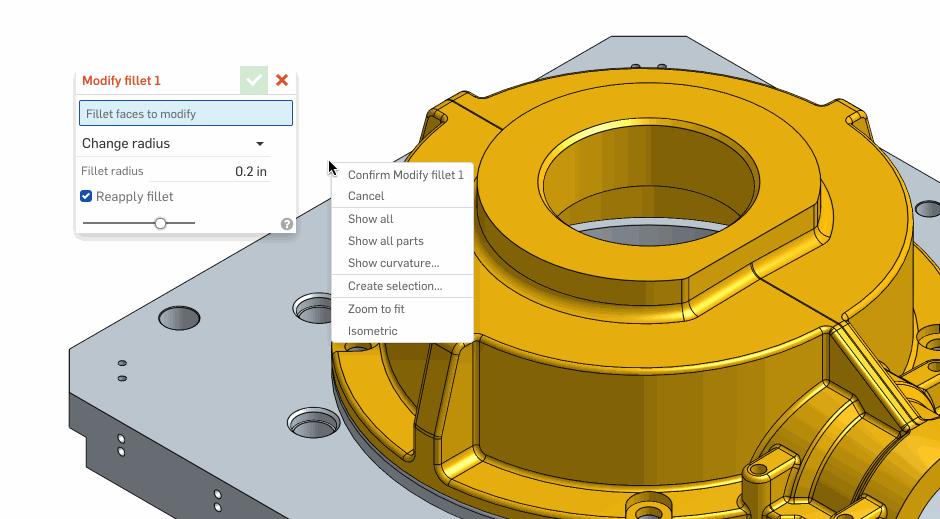
With a few small adjustments, you can become more precise in creating the correct selections. This reduces frustration and increases your productivity.
Interested in learning more Onshape Tech Tips? You can review the most recent technical blogs here.
Latest Content
- Blog
- Becoming an Expert
- Assemblies
- Simulation
Mastering Kinematics: A Deeper Dive into Onshape Assemblies, Mates, and Simulation
12.11.2025 learn more
- Blog
- Evaluating Onshape
- Learning Center
AI in CAD: How Onshape Makes Intelligence Part of Your Daily Workflow
12.10.2025 learn more
- Blog
- Evaluating Onshape
- Assemblies
- Drawings
- Features
- Parts
- Sketches
- Branching & Merging
- Release Management
- Documents
- Collaboration
Onshape Explained: 17 Features That Define Cloud-Native CAD
12.05.2025 learn more


