We are excited to introduce the Onshape Educator Plan, a new offering that is free for teachers or mentors who are training the next generation of engineers. This plan is designed to help you get the most out of Onshape’s revolutionary CAD and data management capabilities by allowing you and your team to access advanced features like Onshape Simulation and Classes & Assignments.
As a FIRST Robotics team, you’re likely wondering what this means for your team and mentors, so let’s get into it.
What happens when I upgrade?
If you indicated that you were an educator or mentor when you signed up, you’ll likely be prompted to upgrade by a pop-up notification when you login to Onshape. You’ll also be able to opt into upgrading your account by clicking here. By upgrading to the Educator Plan, you will become the owner of a “Classroom,” which you can add other users to. When users are added, they will gain access to the advanced capabilities of the Educator Plan. You and your members will still login to cad.onshape.com to access all of your documents.
Who should upgrade?
We encourage all mentors and teachers to upgrade to the Educator Plan. There’s no reason not to upgrade – it will not affect your existing documents and will add more capabilities to your Onshape account. However, we recommend that a team-wide email (that is not tied to a specific individual) owns the Classroom that your FIRST team will use. This process is explained in more detail below.
Do student team members need to upgrade as well?
No, students and student team members should stay on the Onshape Student Plan, formerly known as the Onshape Education Standard Plan. When students are added to a Classroom, they will gain access to the advanced capabilities of the Educator Plan.
Which features will be useful to my team?
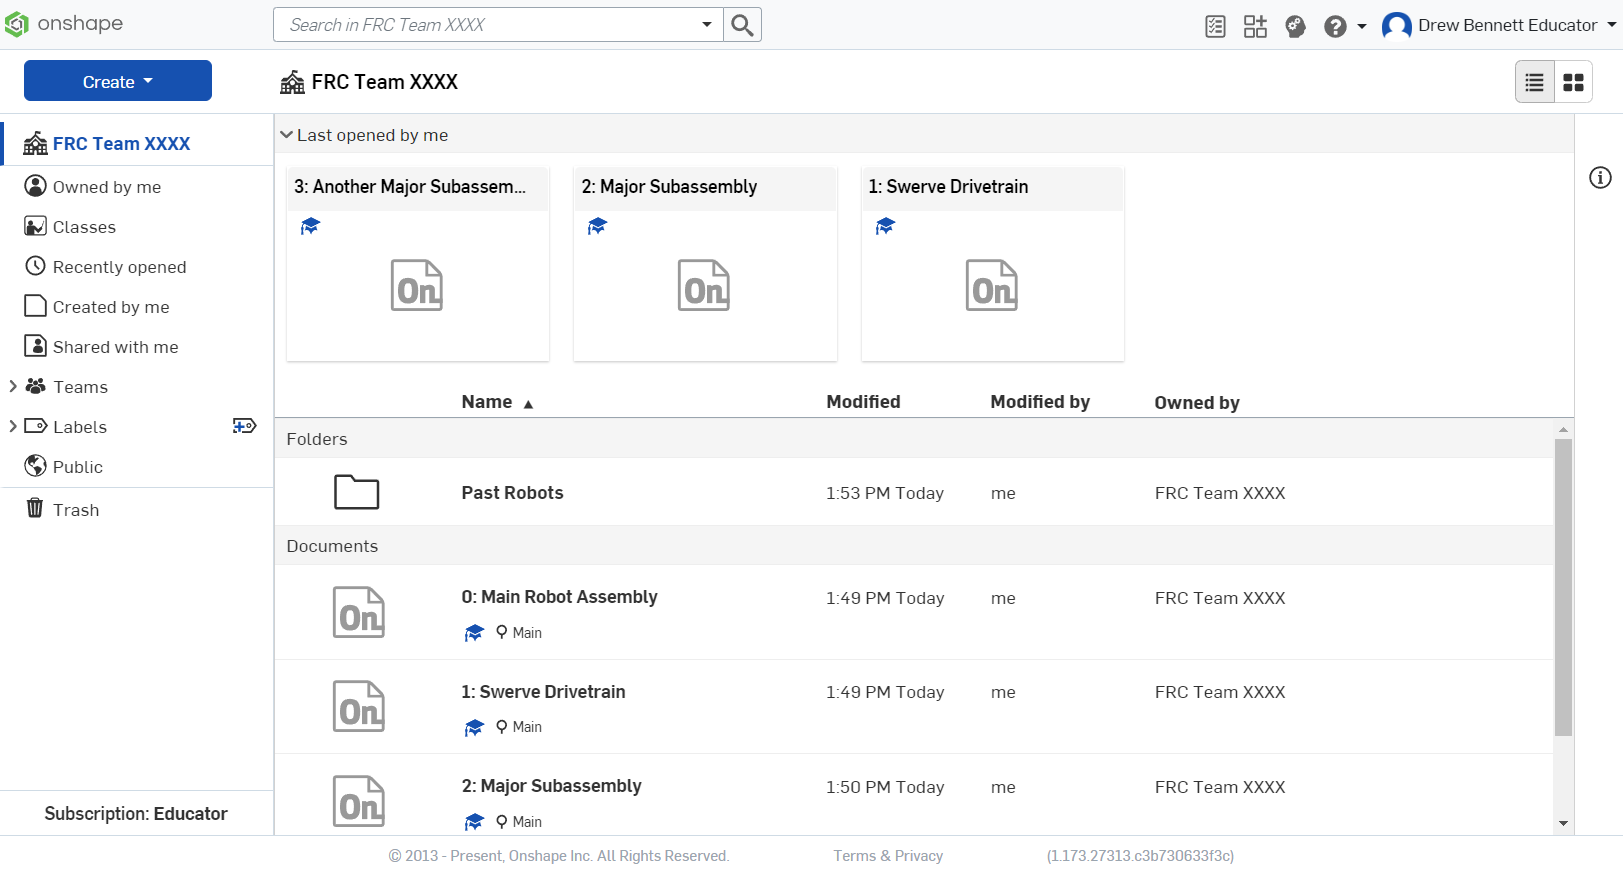
Simpler Document Ownership: This feature in particular will help a lot of FIRST teams. When you are part of a Classroom, you can choose to have the document owned by the Classroom – no more individual ownership of folders and documents. Anyone who has Adminstrator credentials for the classroom can see all of the documents owned by the Classroom, move them around, and delete them. You can also easily share a document or folder with all members of a classroom. This creates a discrete area for all of your team’s documents to live, and when created with a team-wide account as the owner, ensures that documents stay with the team. Don’t worry, though – you can easily choose your individual account as the owner of new documents, too.

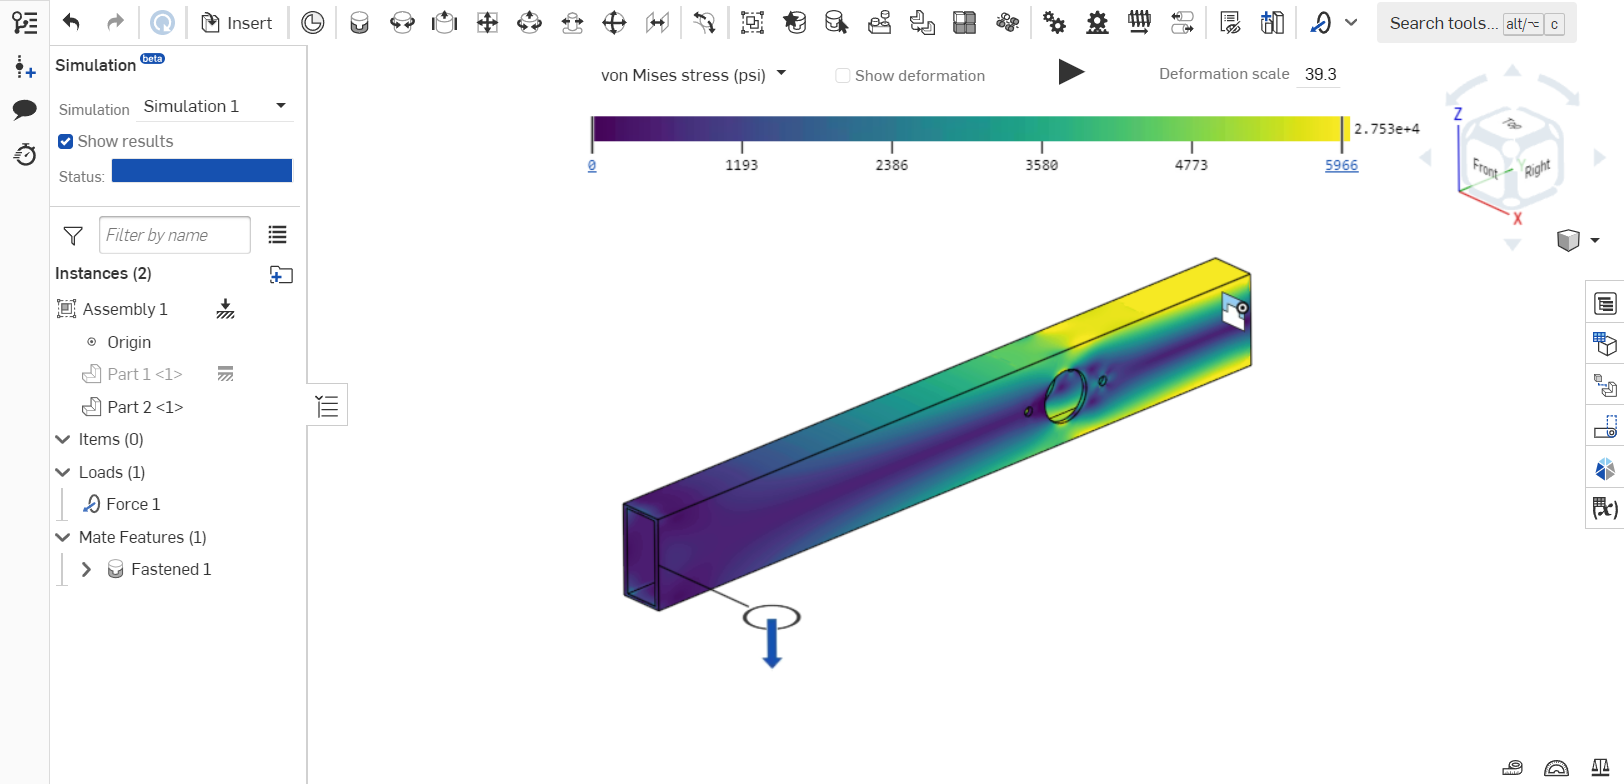
Simulation: Onshape Simulation is the easiest and fastest way to perform structural analyses on your Onshape assemblies. You’ll be able to apply loads and almost instantly see the stress, deformation, and natural frequencies of your parts and assemblies. This is a great way to introduce these concepts to students and check, for example, if you’ve put too many holes in that piece of 1x2 box tubing. Learn more about Onshape Simulation in the Learning Center.

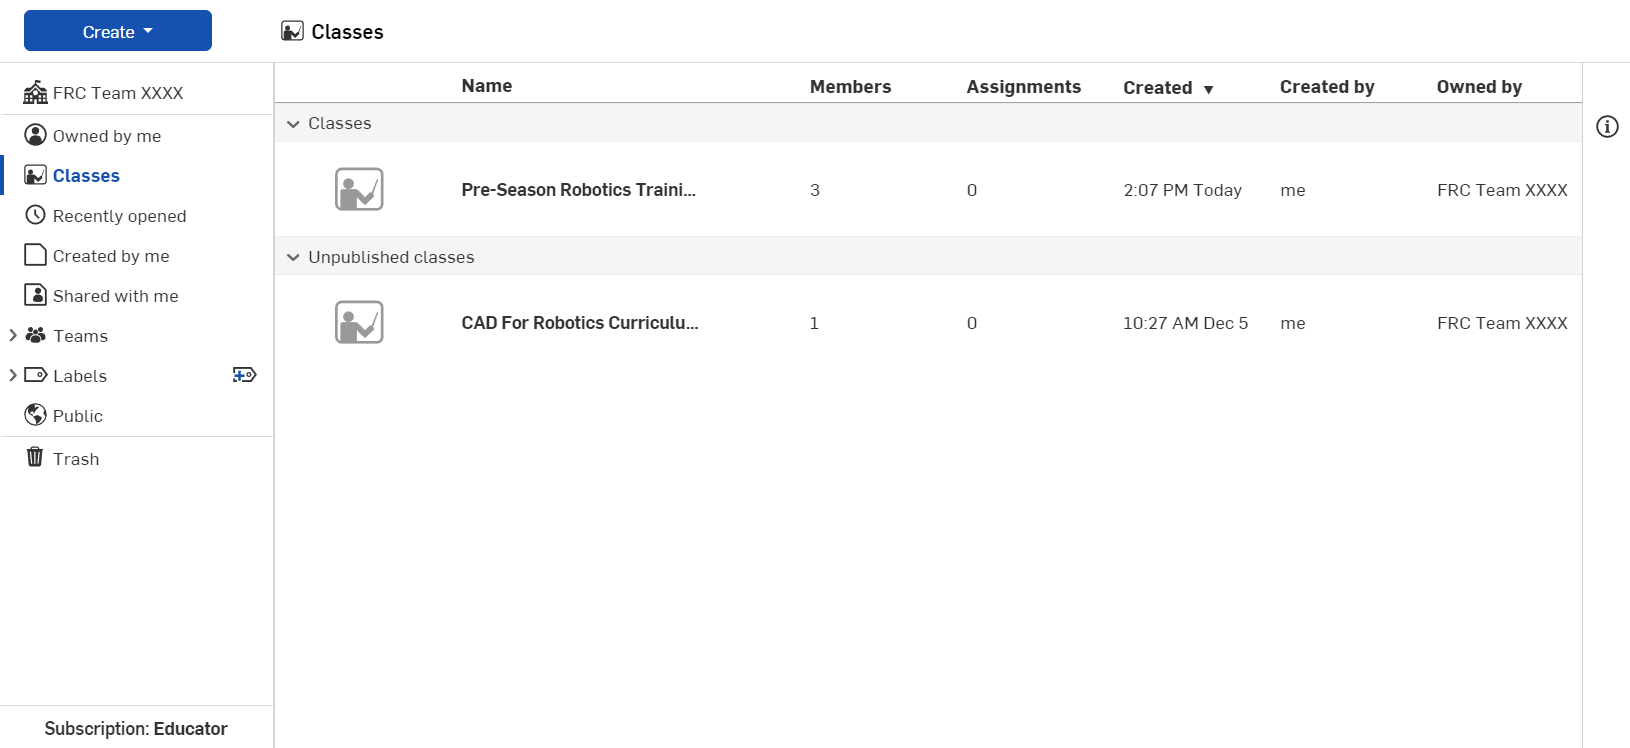
Classes & Assignments: This feature was designed to meet the data management needs of educators to streamline CAD learning. You can create classes, add mentors and students, and easily distribute and collect Onshape documents. This can be a great addition to your team’s off-season CAD training – pair it with resources like the CAD For Robotics Competitions curriculum or Orion DeYoe’s Onshape CAD Class to help your students learn Onshape in an organized way. Learn more about Classes & Assignments in the Learning Center.

Release Management: This is for those teams who want to implement a release management workflow that mirrors what your students will encounter in the industry. You can customize who can create and approve release candidates as well as what the release process steps are. You can learn more about release management in the Learning Center.
Custom Properties, Categories, and Preferences: You can create custom properties to capture more information about the parts you’re designing as well as create custom Bill of Materials templates. This is a great way to help keep track of what goes where!
How should I set up my FIRST team?
Here are the steps we recommend to create your Classroom for your team:
-
Create an email account for your team to use that is not tied to any specific individual. Many teams already have this, so if you do, you’re all set. This is nice because it can be shared between multiple mentors.
-
Go to onshape.com/en/education/sign-up and fill out the sign-up form as an Educator using the shared team email account.
-
When prompted to name your Classroom, name it after your FRC or FTC team. Something like “FRC Team XXXX” will work well.
To get mentors and students added to your Classroom:
-
Log into the Educator account created for the team. In the top right corner, click on the account name and choose “FRC Team XXXX classroom settings”.
-
In the Users menu, you can add users by email. You can choose to make the users you add Admins (edit access to all documents + ability to move and manage them) or members (only access what is shared). Who you choose to give permissions to is up to you.
How do I access documents owned by a Classroom?
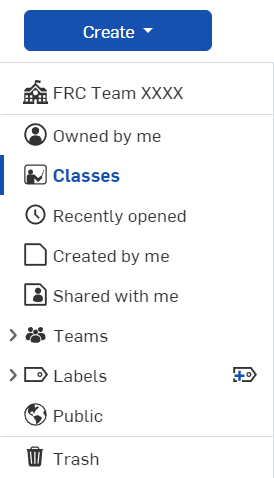
It’s easy to access documents owned by a classroom – simply use the filter on the left-hand side of the Documents menu. In this example, clicking on “FRC Team XXXX” will direct you to documents owned by the classroom that your account has access to. To see documents your account owns, click on the “Owned by me” filter.

How do I choose who owns a document I create?
When you click the Create button, ownership will be based off of the filter you have active on your documents page. You can change this by clicking the home button in the dialog box and choosing a different option from the list.
What else should I know?
From here, you’re free to set up the document structure as you please in your Classroom. When you or other members create documents, you can choose if you will own the document (Owned by Me) or if the Classroom will own it (FRC Team XXXX).
If you have an existing folder structure or some documents you want to move into the Classroom, you can do that if you own the documents/folder and are an admin of the Classroom. Right-click on the item you want to move, click “Transfer ownership”, click on “Classroom”, choose the Classroom and send it over. You will need to re-do some sharing settings when documents are transferred.
For sharing documents in a classroom, all Admins will have access to every document in the Classroom. Members will only see what is shared with them, but you can easily share documents or folders with a whole Classroom in the Share dialog. You can also set up Teams for sharing to specific groups in your classroom.
My team likes the system we have in place; do we need to change to the Educator Plan?
Nope, if you’ve got a good system working, stick with it. We do think that the Educator Plan with a Classroom offers notable benefits, but choose what works best for your team!
Wrap it up!
Hopefully, this answers any questions you and your team have about the new Onshape Educator Plan. We’re excited to roll this out to our community to make Onshape even easier to use in educational settings. If you still have questions, don’t hesitate to reach out to us at first@ptc.com.
Get Started with Onshape Education
Onshape for education brings CAD out of the computer lab and into the modern era.


