Changing properties of a drawing view is typically done by right-clicking on the view, hovering over the corresponding property, and selecting a new value.
For example, to change this view to “shaded”, right-click on the view, hover over “Show/hide”, and select “Show shaded view”.

What if you wanted to change multiple properties? For example, you want to change the view orientation, show it exploded, and hide specific components. Typically this involves multiple right-clicks, one for each property you want to change.
Using the View Properties Dialog
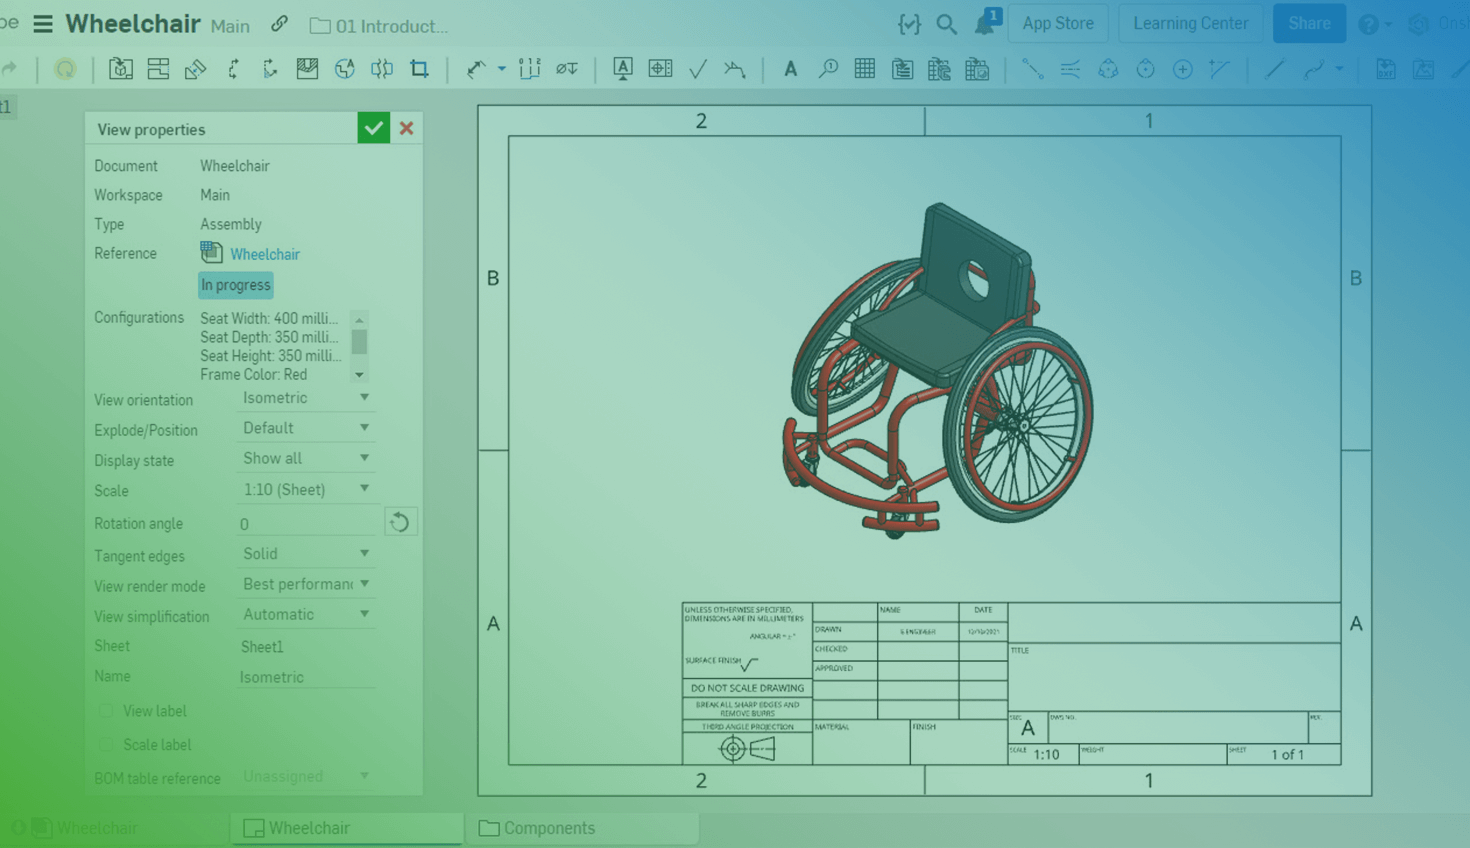
A faster method is to modify these properties directly inside the “View properties” dialog.
To open this dialog, double-click on a view. Once opened, you can change multiple properties at once without having to leave the dialog.
You can view the referenced configuration, use a Named view, reference a particular exploded view, or hide components by selecting a “Display state”.
Other properties may be changed, such as a view’s scale, rotation angle, tangent edges, and even renaming the view.
As properties are changed, the view updates in real-time. There is no need to click accept first to see the change. If the view orientation changes, dependent views such as projected views, also update.
Once you set the desired properties, click “Accept”, and the view is updated.
As you can see, modifying multiple properties inside this dialog allows you to see the changes update in real-time versus one at a time using the right-click method.
This Tech Tip helped you learn how to quickly change drawing properties inside of one location simultaneously. Watch the video below to see this tip in action.
We have more resources for you to learn more about related features, like drawing creation and setting properties inside the Learning Center.
Interested in learning more Onshape Tech Tips? You can review the most recent technical blogs here.


