


1:15
Branching designs in Onshape is a powerful capability that allows you to build variations and experiment with new ideas in your Document. Let’s take a look at creating a branch in your design.
The first step in creating a branch is establishing a version. From the Version Manager, select “Save Version.” Here you can type in the name of the version and click “Save.”

Now that we have an established version, we can select the “Branch to create workspace” command from the gear dropdown menu in the Version Manager.

Type in the name and a description and click “Create.”

After creating the branch, you’ll find it listed in the Versions Manager.

All changes made to that branch will not impact others in your Document. In my example, I create a 7” version of this design as a branch. I can then change the design to be a 7” configuration and the original is not altered.
Branching can also be very useful when experimenting with design changes. It allows you to create a branch (or multiple branches) for each experiment and make the design changes without worrying about impacting the original. You can even compare branches to get a close look at the changes. These changes can also be merged with the original design.
So if you are looking for a way to build variations of your design, or if you or your team want to experiment with changes in your own workspace, try creating a branch!
Latest Content
- Blog
- Becoming an Expert
- Assemblies
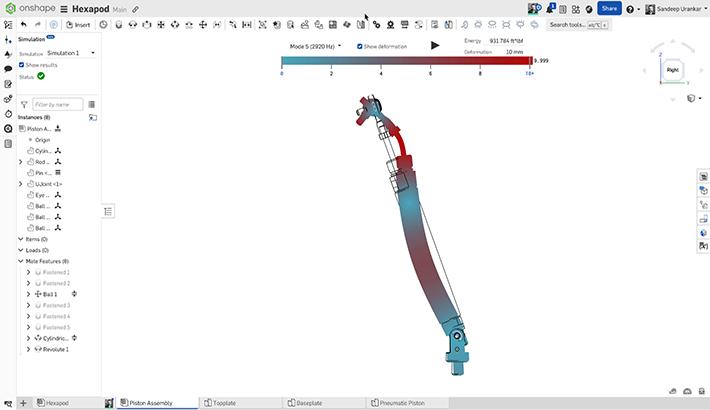
- Simulation
Mastering Kinematics: A Deeper Dive into Onshape Assemblies, Mates, and Simulation
12.11.2025 learn more
- Blog
- Evaluating Onshape
- Learning Center
AI in CAD: How Onshape Makes Intelligence Part of Your Daily Workflow
12.10.2025 learn more
- Blog
- Evaluating Onshape
- Assemblies
- Drawings
- Features
- Parts
- Sketches
- Branching & Merging
- Release Management
- Documents
- Collaboration
Onshape Explained: 17 Features That Define Cloud-Native CAD
12.05.2025 learn more


