2:47
In his blog post yesterday, my colleague Daniel Murphy noted that “it’s not easy to keep up with the rapid pace of new features and enhancements being added to our full-cloud CAD.”
So in that spirit, here are some more Onshape updates to digest:
REAL-TIME CHAT IN COMMENTS
The Comments system now supports real-time text chat between multiple users working in the same Onshape Document.
ANGLE FLANGE BY REFERENCE
You can now specify an angle reference when creating a sheet metal flange.
MERGE SCOPE FOR SURFACES
When creating surfaces using Onshape's advanced modeling tools, you can now specify a merge scope and choose which surfaces to merge them with.
DATUM EXTENSION LINES
A datum symbol can now be dragged off a face and an extension line is automatically created.
GRIP EDIT RADIAL AND DIAMETER DIMENSIONS
You can now edit the target geometry for radial and diameter dimensions using the grip point at the tip of the arrowhead.
COPY ANNOTATIONS BETWEEN DRAWINGS
In addition to being able to copy annotations such as Notes, Surface Finish symbols, Weld symbols, Geometric Tolerances and Tables between sheets of the same drawing, you can now also copy and paste them into different drawings in the same Onshape Document (and into drawings in other Documents, too). This makes it much easier to copy standard annotations from one drawing to another.
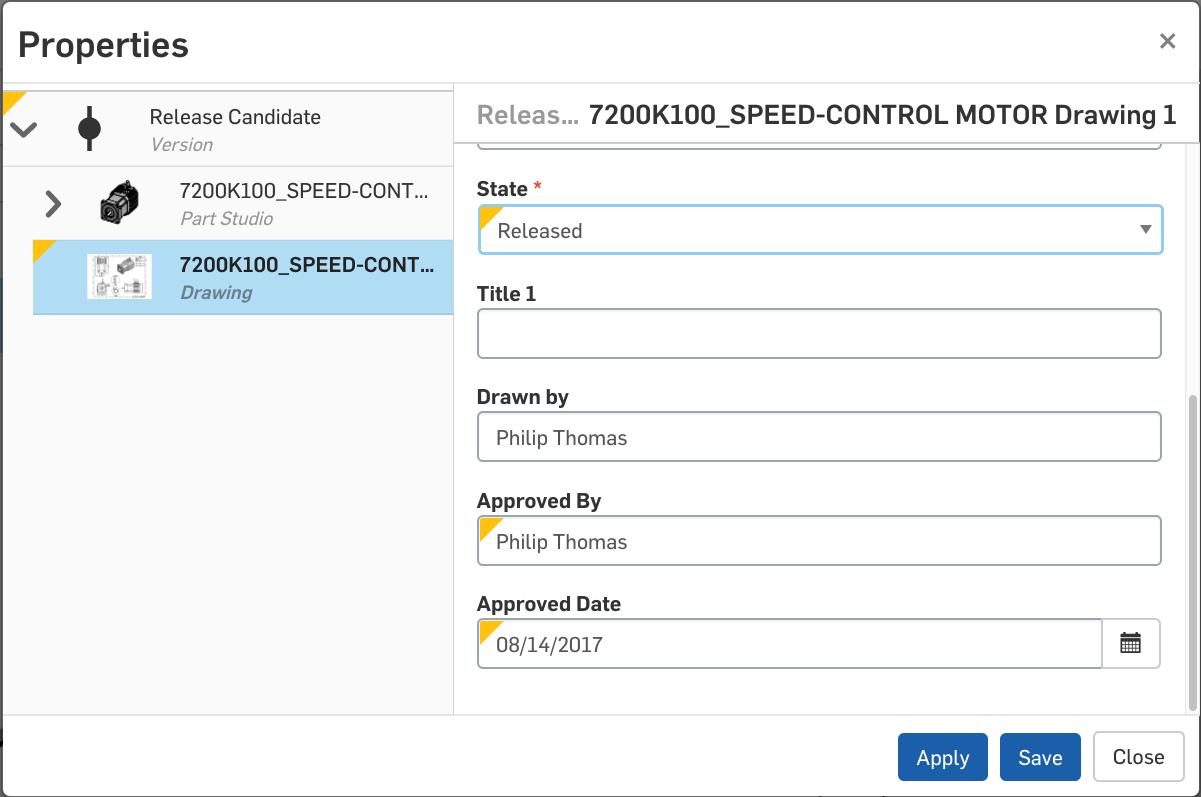
UPDATE OF VERSIONED DRAWINGS TO REFLECT CHANGES TO METADATA
This latest update contains a significant architectural change designed to improve your ability to implement a release management workflow using Onshape. This work lays the foundation for new capabilities that you will see in future releases. We are making this feature available now so that you can take advantage of this new workflow. You can read a more detailed explanation here to explain our thinking and direction.

VERSIONED DRAWING THUMBNAILS
Now when a version of an Onshape Document is created, a thumbnail is generated for each part, assembly and drawing so you can see at a glance how that drawing looked in that version when using the Tab Manager or other tools that display thumbnails.
Note: Thumbnails are generated after a versioned drawing has been viewed for the first time.
QUICK LINKS TO IMAGE FILES IN DRAWINGS
You can now quickly find the source file of an image added to a drawing by right-clicking the image and selecting one of two available options. If the image is located within the active Document, the menu will display "Switch to <element name>" and you will be taken straight to that tab. If the image was linked from another Document, the menu will display "Open linked document" and the image tab within that linked Document will be opened in a new browser tab.
OPEN VIEW PROPERTIES FROM VIEW AND SCALE LABELS
When you double click a view label or a scale label, the View Properties dialog will now appear. Previously, double clicking these labels would allow you to edit the text in the label. If you still wish to do this, right-click the label and select "Edit note." For your convenience, the right-click context menu for labels now also includes all the options found on the view right-click context menu, and the options for "Copy" and "Move to" have been removed.
Latest Content

- Blog
- Becoming an Expert
- Assemblies
- Simulation
Mastering Kinematics: A Deeper Dive into Onshape Assemblies, Mates, and Simulation
12.11.2025 learn more
- Blog
- Evaluating Onshape
- Learning Center
AI in CAD: How Onshape Makes Intelligence Part of Your Daily Workflow
12.10.2025 learn more
- Blog
- Evaluating Onshape
- Assemblies
- Drawings
- Features
- Parts
- Sketches
- Branching & Merging
- Release Management
- Documents
- Collaboration
Onshape Explained: 17 Features That Define Cloud-Native CAD
12.05.2025 learn more


