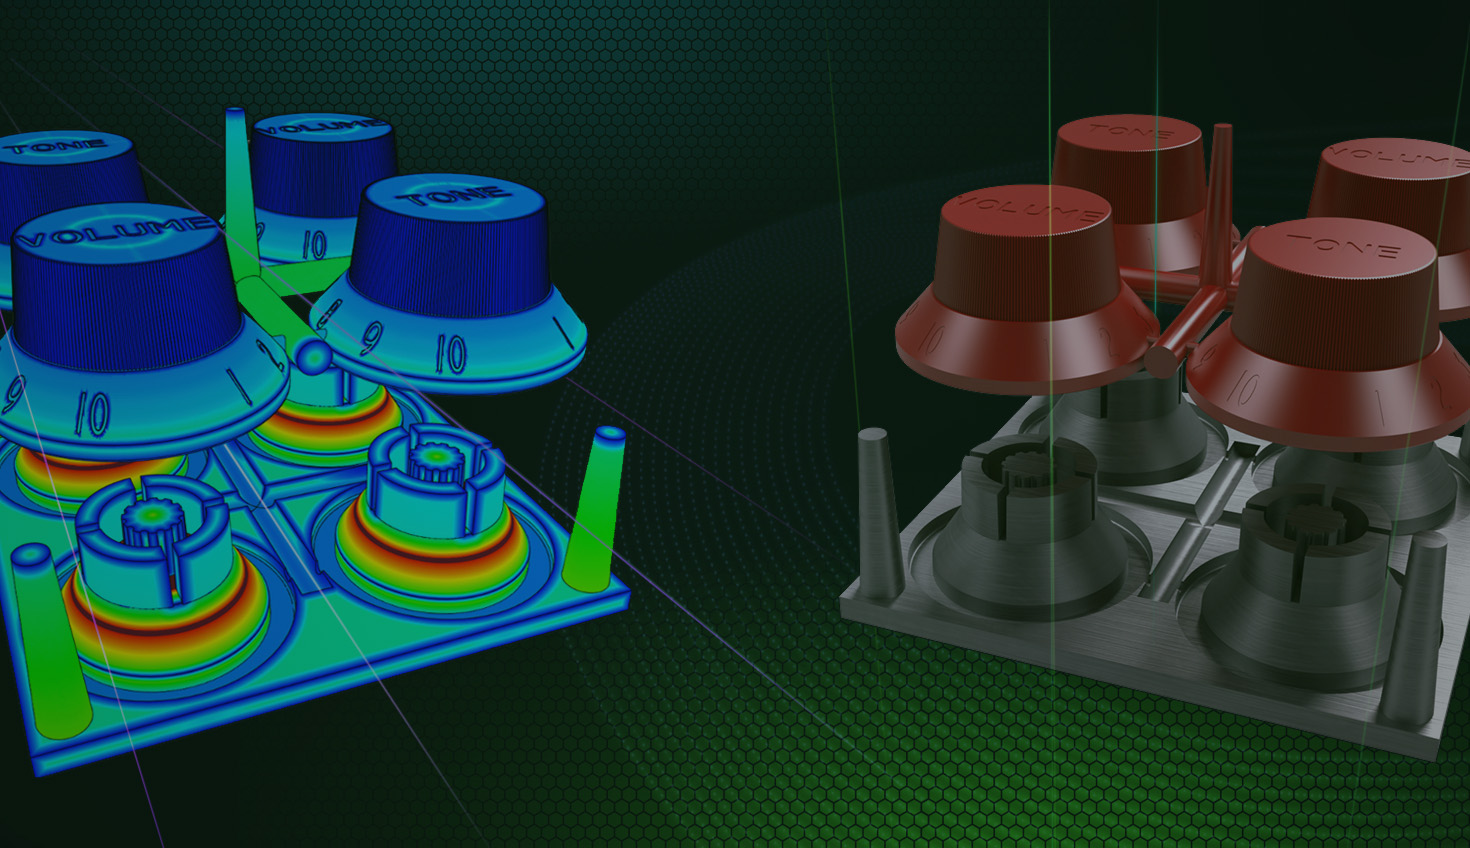
Onshape’s Thickness Analysis tool is a versatile capability that expands our suite of design and inspection features. For anyone involved in the design and manufacture of components like plastics, molds, or castings, thickness analysis is essential, helping ensure durability, manufacturability, and quality.
This tool enhances the capabilities of the Part Studio, providing valuable insights to support better decision-making throughout the design process. So, let's jump right in!
What is Thickness Analysis?
Thickness Analysis, as the name suggests, provides engineers and designers with a comprehensive view of material distribution within a part, offering insight into its structural integrity and manufacturability. To see Onshape's Thickness Analysis in action, view the video below:
How is the Thickness Calculated in Onshape?
Onshape’s Thickness Analysis offers two primary calculation methods, each tailored to provide unique insights into a part’s internal structure. Let’s explore these methods.
Ray Thickness Method
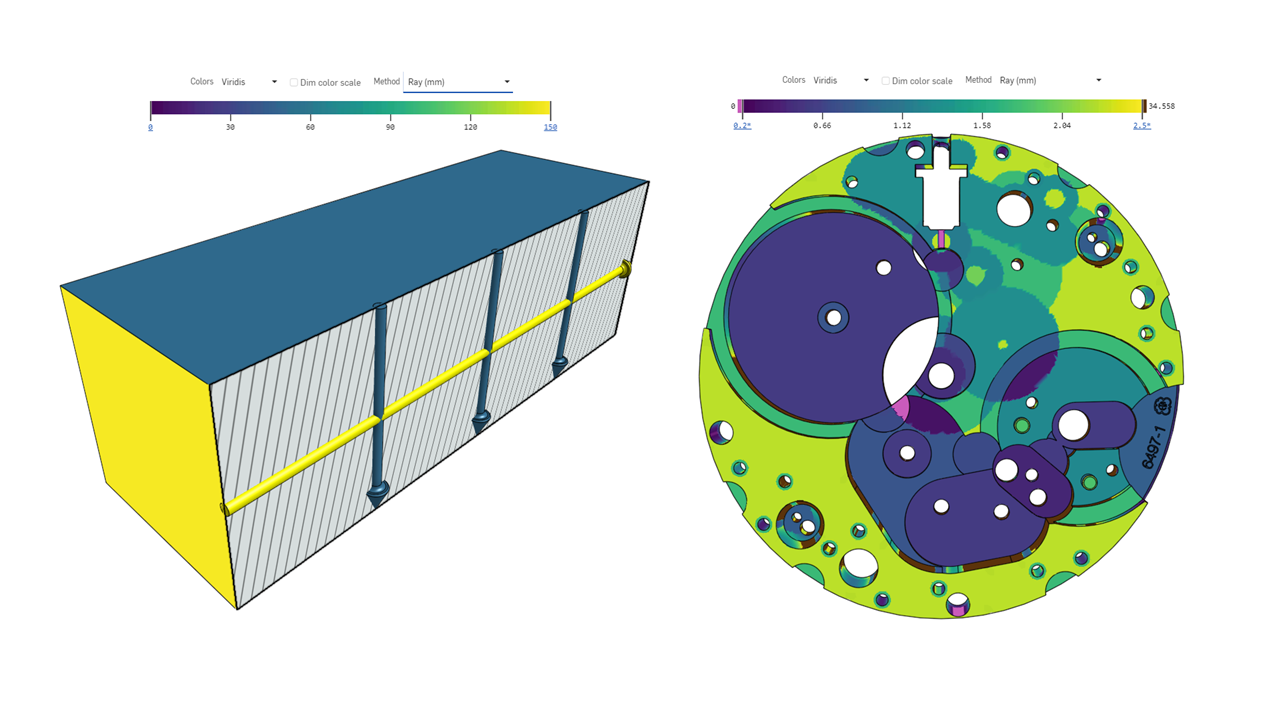
The “ray thickness method” calculates the distance traveled along a straight-line path through the interior of a part. At each point along the part’s surface, a ray is projected – normal to that surface – terminating upon the first intersection at another point along the part. The length of the line segment between those two points is called the ray thickness.
Though straightforward to conceptualize, and useful for parallel segments of geometry, this thickness measurement poses two challenges:
-
Regions that appear “thin” may still report enormous ray thicknesses, so long as line-of-sight is narrowly permitted through the part’s length.
-
Ray thickness distribution is seldom continuous across the entire part. In fact, one should expect the ray thickness distribution to contain sharp discontinuities, such as near sharp corners.
Rolling Ball Thickness Method
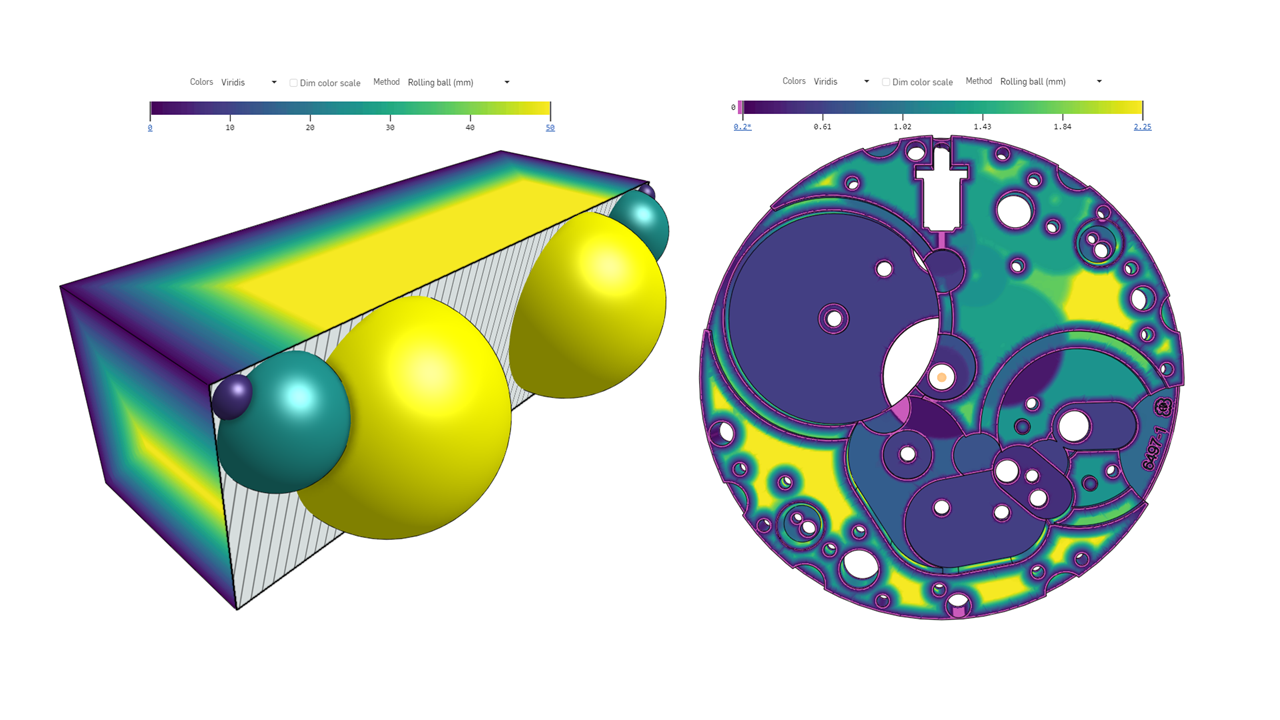
The rolling ball thickness method calculates the size of the largest sphere that can be inscribed within a part at each point along the part’s surface. This sphere is tangent to the point of inspection and is thus said to “roll” along the part’s interior (while simultaneously changing size). The thickness measured is reported as the diameter of the sphere.
Though more difficult to conceptualize, and considerably more difficult to calculate, the rolling ball method overcomes the weaknesses of the ray thickness method. Its strengths, explained below, make it more robust and universally applicable.
-
It provides a thickness measurement defined by localized geometric relations with more than one point of interest.
-
Its distribution is guaranteed to be continuous across all regions of any solid part.
Thickness Gradient (Ray Method or Rolling Ball Method)
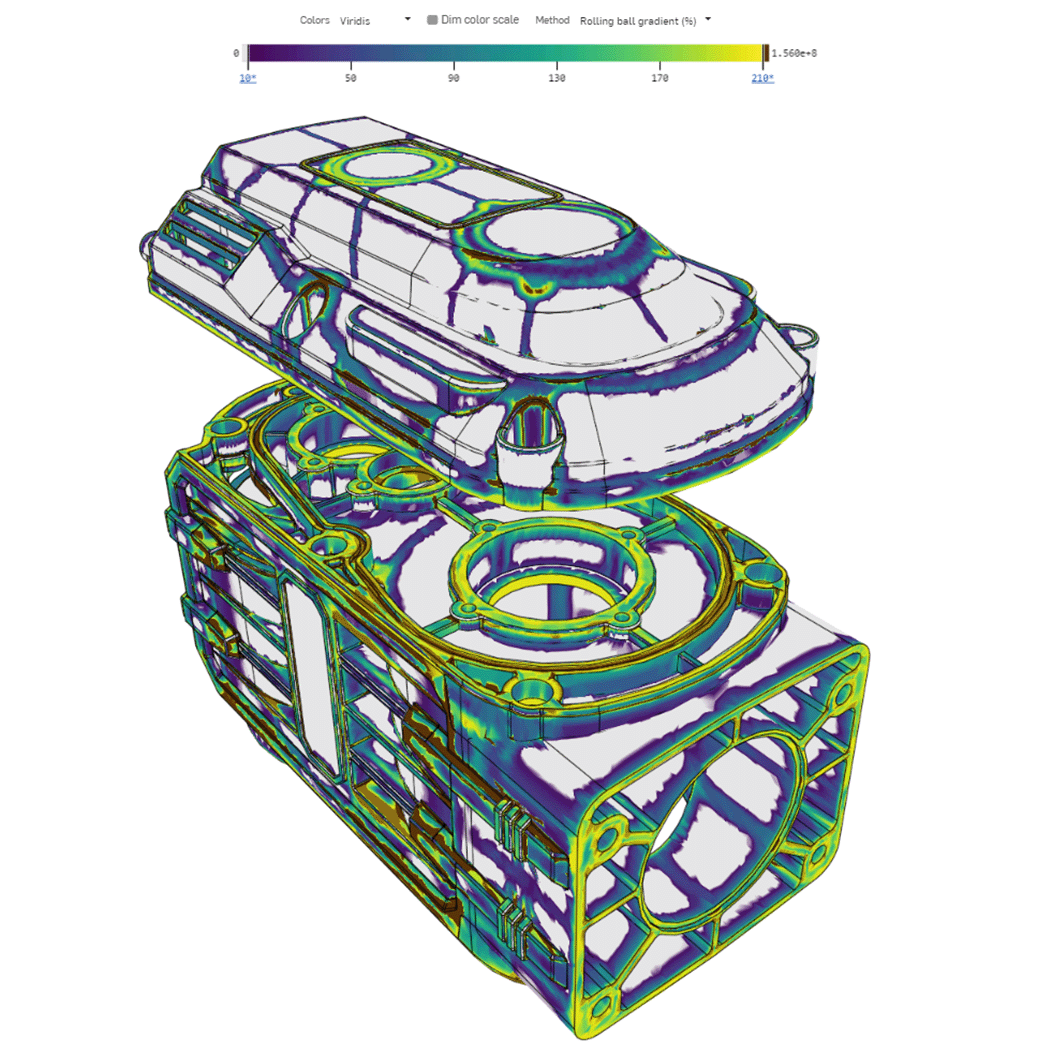
During the development of this tool, we learned that for many of you, it’s not just important to understand the thickness of a part, but also how quickly its thickness changes. To that end, we propose a novel approach: the Thickness Gradient.
The thickness gradient measures how quickly the thickness of a part changes as one moves along the part’s surface. The ratio itself is non-dimensional and non-negative and presented as a percentage (%) of the thickness value at that point. We hope that this new option provides you with a clear and measurable view into the dynamic regions of your design.
Why is Thickness Analysis a Game-Changer?
In the competitive fields of plastics, injection molding, and casting, the precision and quality of design analysis tools can make all the difference. With Onshape’s Thickness Analysis, we’re not just catching up to existing standards; we're setting a new benchmark. Our implementation leverages the powerful simulation engine behind Onshape Simulation, delivering results with exceptional accuracy and visual clarity.
For product designers and engineers, this means faster, more accurate assessments of part manufacturability. Whether you’re checking for potential cracking in thin sections or ensuring proper cooling in thick areas, Thickness Analysis provides critical data to help you make informed decisions.
Who Can Benefit?
Thickness Analysis will first be available to Onshape Enterprise plans, then will be rolled out to Professional and Education Enterprises soon thereafter. It’s an invaluable tool for design engineers, especially those working with moldable or castable parts. Whether you are looking to replace an existing tool or need a high-quality solution for the first time, Onshape’s Thickness Analysis offers the best in the industry.
Join the Future of Design with Onshape
With Thickness Analysis, Onshape is not just enhancing your ability to design better parts – it's redefining the standard for precision and innovation in product development. This powerful feature empowers engineers to gain crucial insights that can help optimize manufacturability.
So, if you’re looking to improve your existing processes, Thickness Analysis is a step in the right direction. Join us in shaping the next generation of design, with Onshape.
The Onshape
Discovery Program
Learn how qualified CAD professionals
can get Onshape Professional
for up to 6 months – at no cost!


