2:12
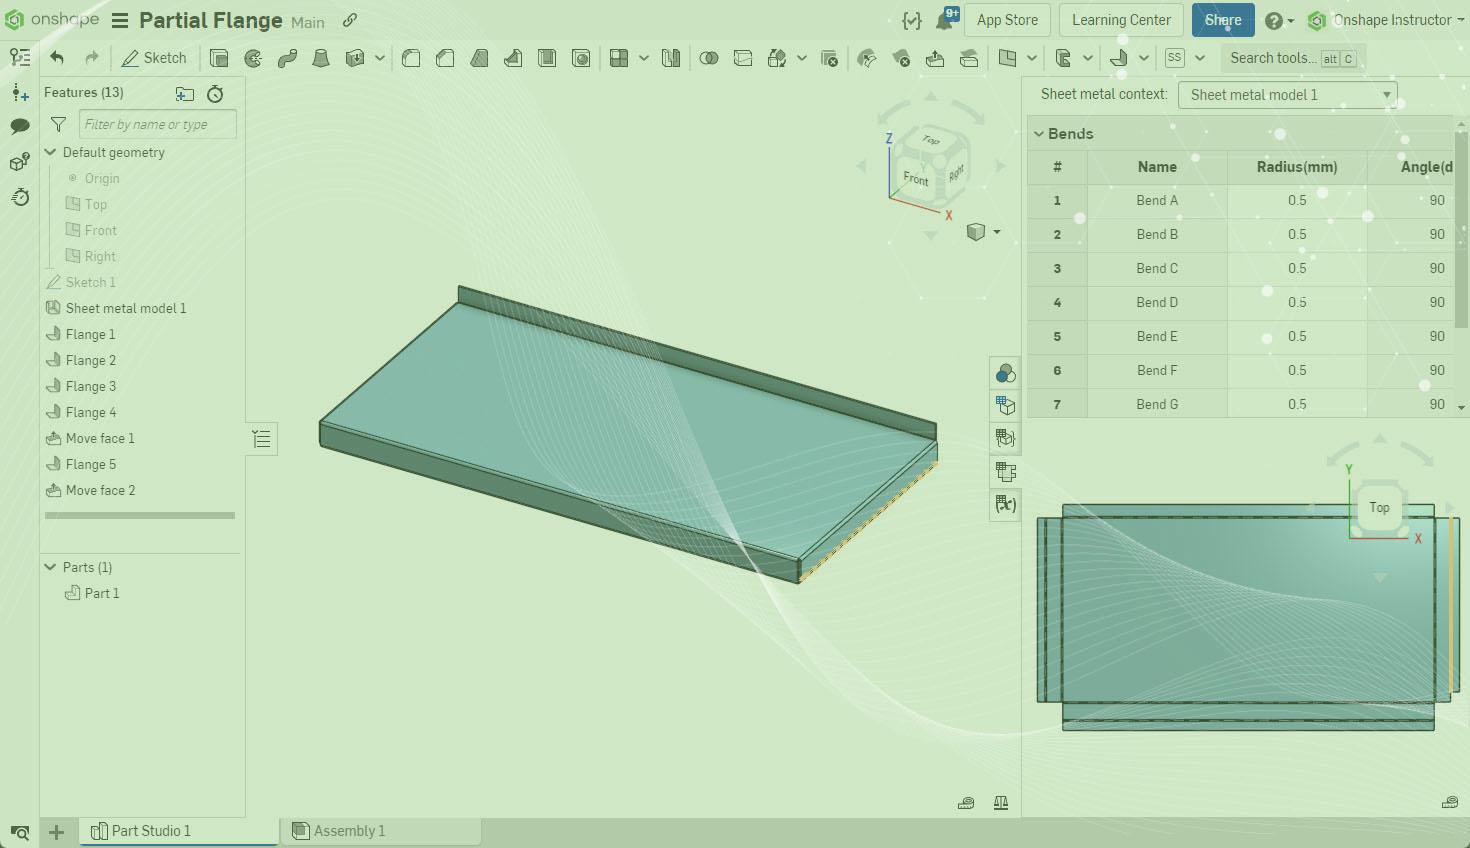
Often in sheet metal design, there is a need to shorten a flange. For example, see the shelf below where the front and side return flanges interfere and return an error inside the Flange feature. In this example, the design intent is to have both flanges in line with each other and not overlap.
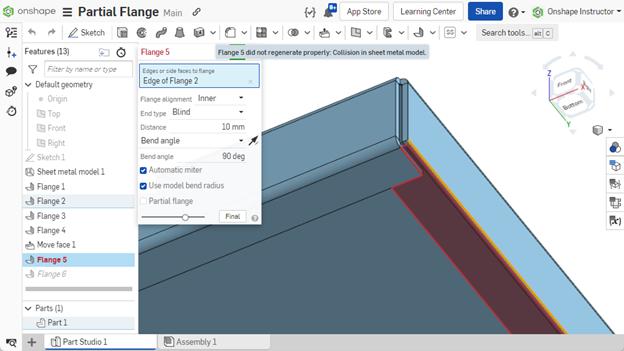
You can resolve this a couple of different ways. The first is to use Onshape's direct editing tool “Move Face” with either the offset or translate option. The second is to offset the flange directly within the Sheet Metal feature. This Tech Tip discusses the latter method.
Offsetting the Flange Directly
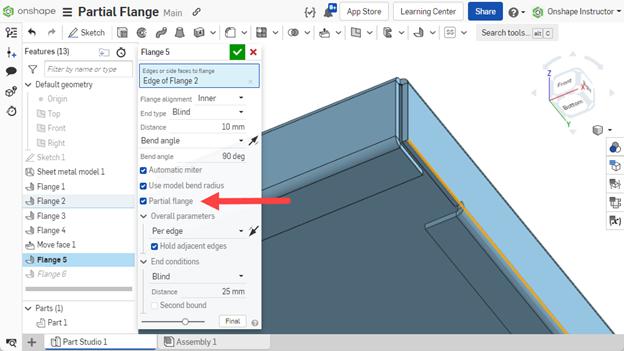
While editing the Flange feature, check the Partial Flange option at the bottom of the dialog box. Once checked, the flange offsets and the error resolves. The offset distance still has to be set.
Once checked, several options are available to control this offset.
There are two options for Chain Type, Per Edge, and Per Chain.
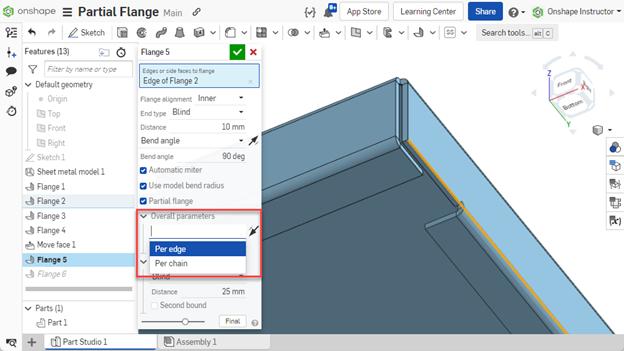
Per Edge applies the offset to each edge selected starting from the same end. In this part below, notice where the offset occurs, as multiple flanges are chosen:

Per Chain applies the offset to one end of multiple edges selected, as shown in the image below. Selecting the arrow flips the offset.
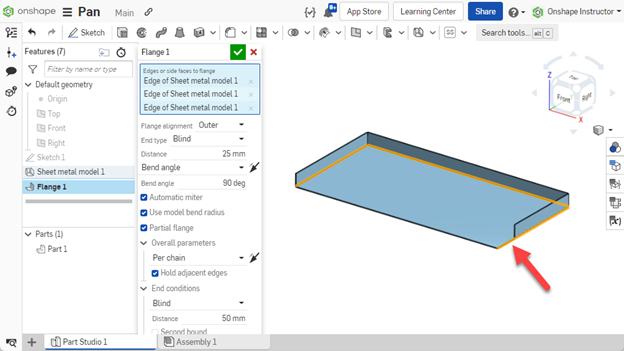
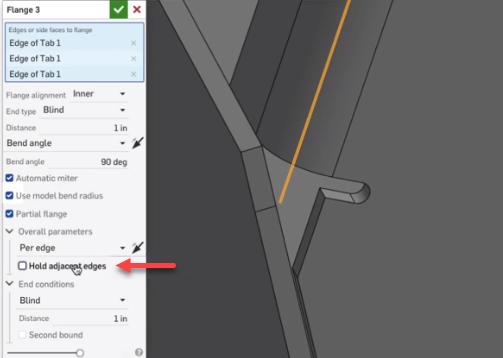
Next, decide if you want to hold the adjacent edge. If checked, the flange extends the entire edge length. Unchecked, it is limited to the length of the partial flange.

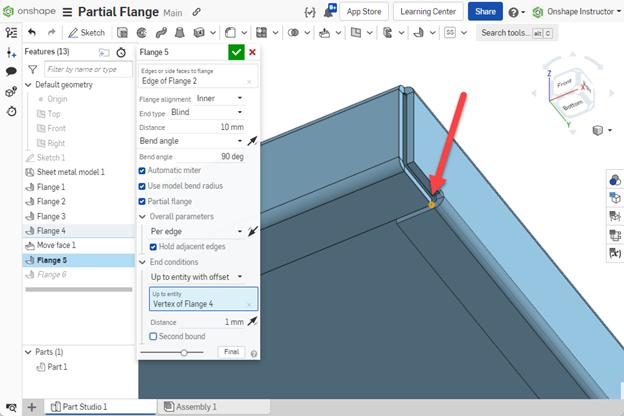
Three types of end conditions are available: Blind, Up to Entity, and Up to Entity with Offset. Select the corresponding type and then input a value. This shelf is to be offset 1mm from the end of the other return flange. Like earlier, click the arrow to flip the offset if it's in the wrong direction.
If desired, you may add a second offset by checking the Second Bound option and repeating the previous steps. This shelf doesn't require a second offset.
When finished setting the parameters, click Accept. The flange is now 1mm from the front-return flange and no longer shows an error.
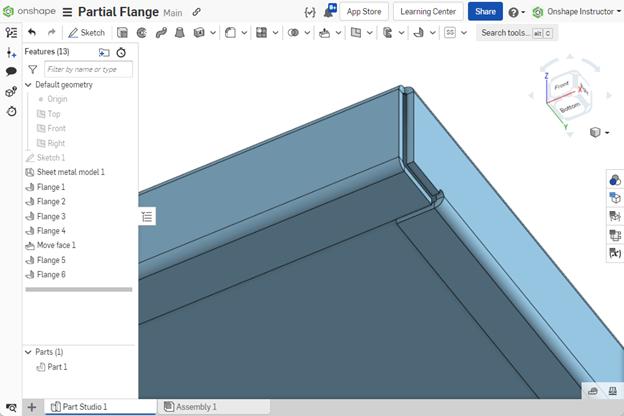
Creating a partial flange inside the Flange feature is faster than using traditional methods like adding cutouts or the Move Face feature. Learn more by watching the video below:
This Tech Tip helped you learn how to create a partial flange while editing the Flange feature and changing options to provide different results. We have more resources for you to learn about related Sheet Metal features inside the Onshape Learning Center.
Interested in learning more Onshape Tech Tips? You can review the most recent technical blogs here.
Latest Content
- Blog
- Becoming an Expert
- Assemblies
- Simulation
Mastering Kinematics: A Deeper Dive into Onshape Assemblies, Mates, and Simulation
12.11.2025 learn more
- Blog
- Evaluating Onshape
- Learning Center
AI in CAD: How Onshape Makes Intelligence Part of Your Daily Workflow
12.10.2025 learn more
- Blog
- Evaluating Onshape
- Assemblies
- Drawings
- Features
- Parts
- Sketches
- Branching & Merging
- Release Management
- Documents
- Collaboration
Onshape Explained: 17 Features That Define Cloud-Native CAD
12.05.2025 learn more


