Today’s tech tip comes from a simple, but commonly asked question: “Is it possible to customize the toolbar in Onshape?” The short answer is yes. Let’s take a look at how.
To customize either the Part Studio or Assembly toolbar, right-click any icon in the toolbar and you will see the option to “Customize toolbar.”

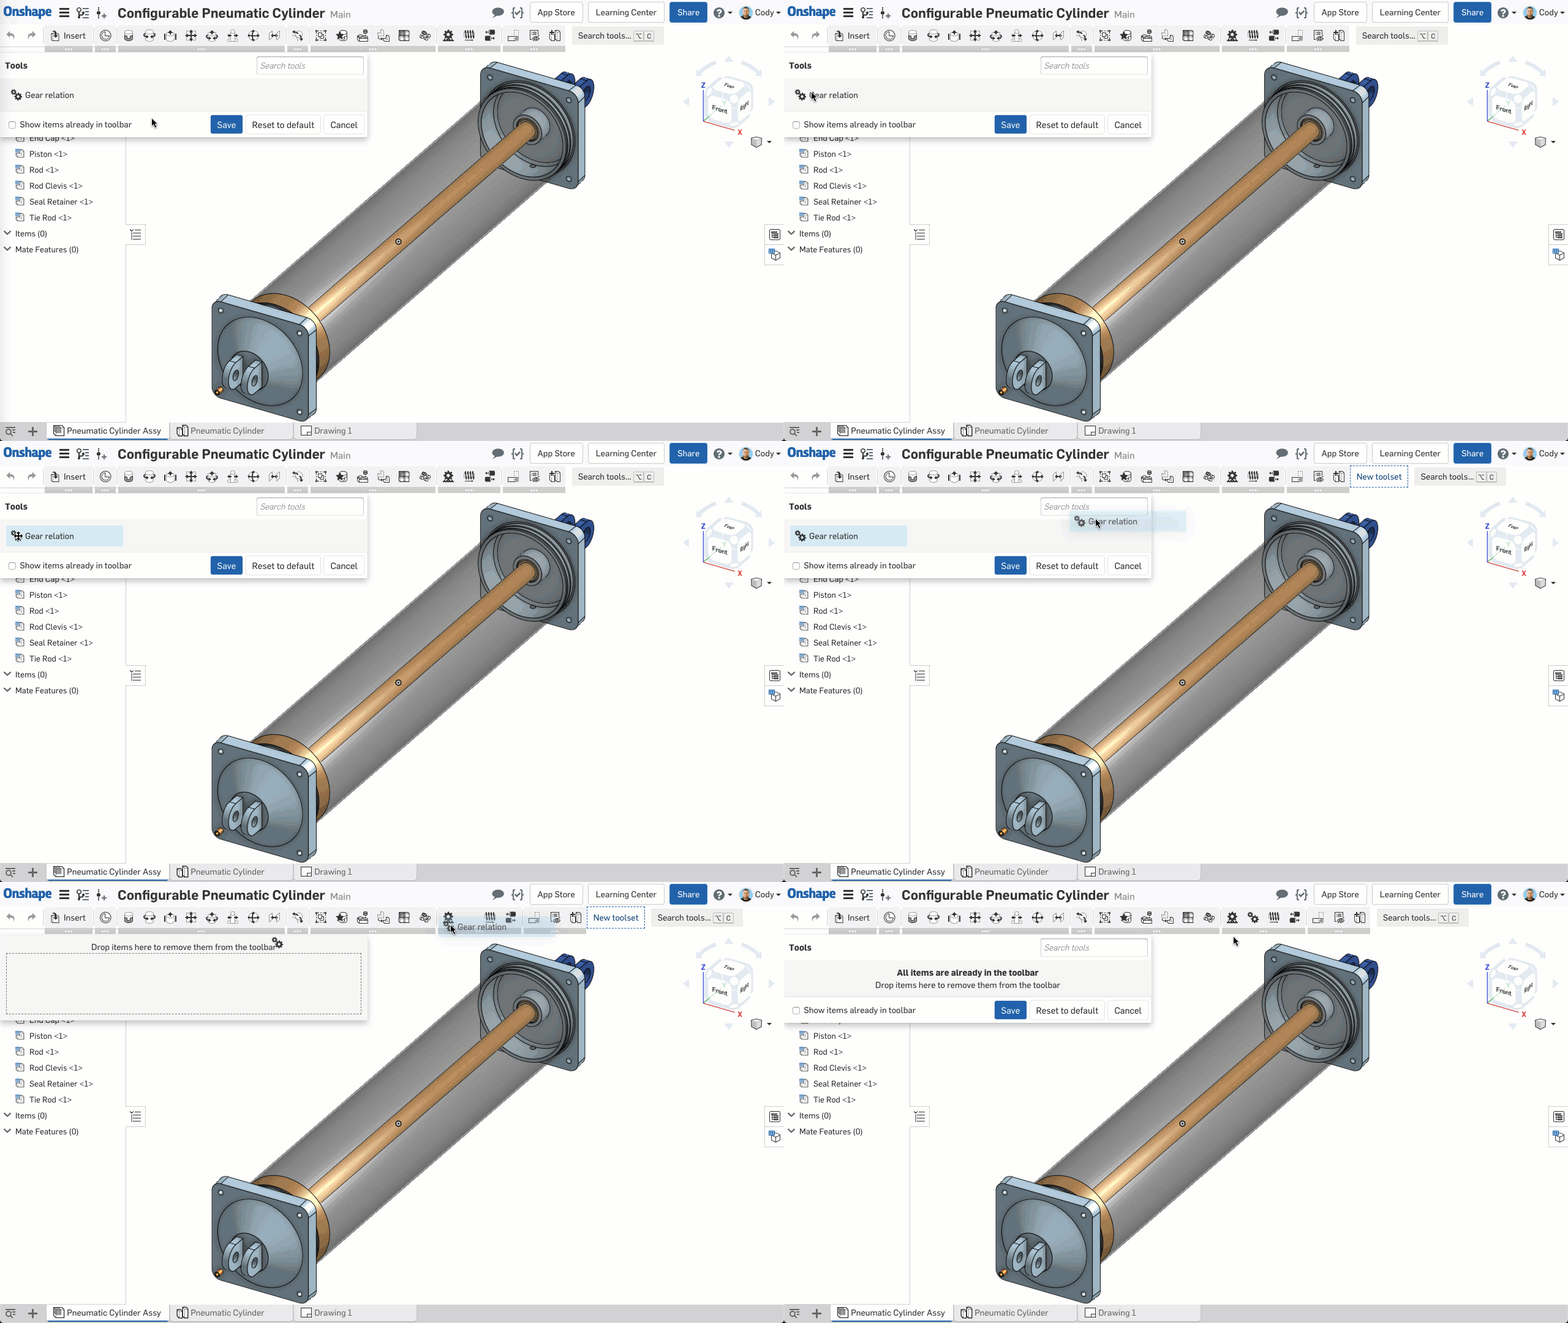
The Customize toolbar dialog will now appear. To remove a feature (or group of features) from the toolbar, left-click drag that icon into the Customize toolbar dialog.

To add a tool back to the toolbar, just do the opposite.

You can also move tools from one group within the toolbar to another by left-click dragging.

You can even move entire groups of tools by left-click dragging them.

If you ever want to reset your toolbar back to the default settings, just click the “Reset to default” button in the Customize toolbar dialog.
So that’s it! This tip will help those who really want to make the Onshape user interface best fit their needs.


